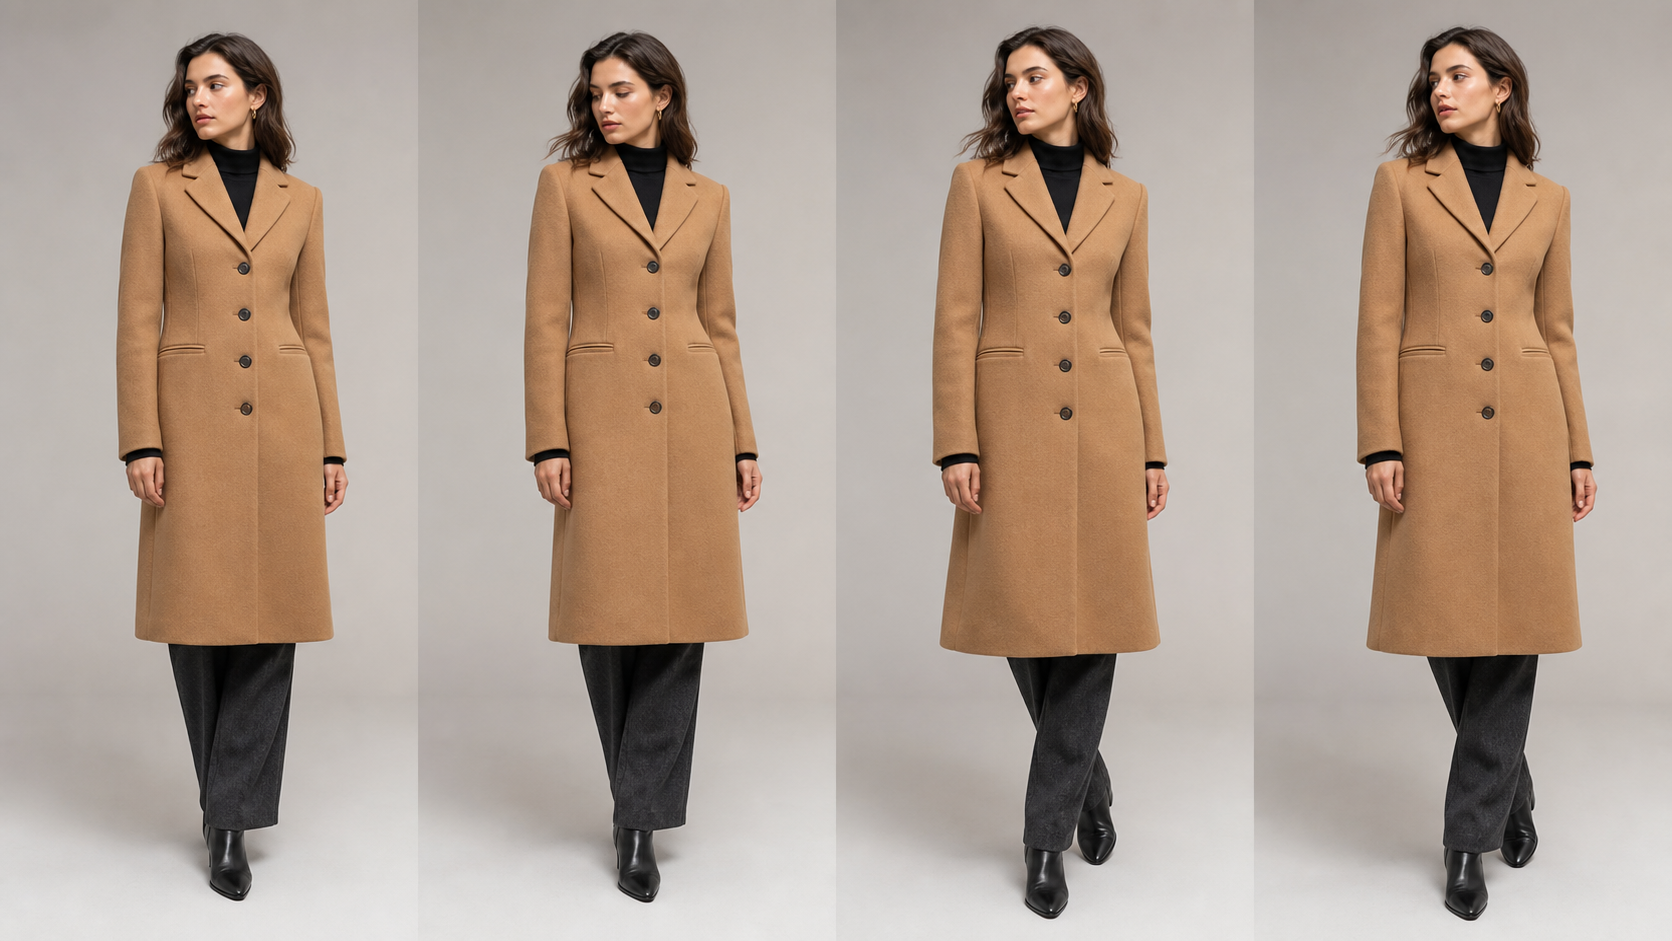
Still product photography remains essential in fashion ecommerce, but many customer touchpoints now move. Short social clips, lookbook loops, and homepage heroes can show how fabric breathes, drapes, and catches light without immediately arranging another full shoot.
The hard part is not producing motion. It is preserving the product. Generative video can alter faces, hands, seams, buttons, prints, logos, hem lengths, and garment proportions from frame to frame. A clip may feel beautiful while inaccurately presenting the item a customer is considering.
Fashion photo-to-video AI is therefore a preservation-first workflow: choose a strong source, set a conservative motion budget, prompt for movement rather than restyling, test a small batch, and compare every surviving clip against the original product image.
Why Fashion Is a Difficult Image-to-Video Case
Clothing is structured geometry. A collar has a specific angle, a placket has measurable button spacing, a neckline has a defined shape, and a print occupies a particular place on the cut panels. When those relationships change during motion, the result is not a harmless visual variation—it is a different product.
Material behavior also matters. Chiffon can float; stiff denim should resist. Tailoring holds a silhouette; loose knitwear deforms more softly. Asking a structured blazer to move like a scarf makes the garment look wrong even if the animation is smooth.
The source image already establishes the subject, composition, lighting, and style. The motion prompt should not redescribe a new fashion concept. It should specify what moves, how the camera behaves, and which product details must remain fixed.
Step 1: Choose Source Photos That Animate Well
Motion amplifies the strengths and weaknesses already present in a frame. Choose sources that provide clear evidence and a plausible path for movement.
Use a sharp, single-subject image
One model, one coherent look, and a background that does not compete with the garment produce a more controllable starting point. Leave space around the body so a small step, sway, or crop has room to develop.
Crowds, racks crossing the silhouette, busy signage, and overlapping accessories give the model more boundaries to reinterpret.
Match framing to the shot
Use a full-body source for a gentle weight shift, small step, or garment sway. Use a real close-up for textile, stitching, hardware, or print detail rather than enlarging a soft crop from a wide photograph.
The source should contain the information you plan to evaluate. You cannot accurately check button attachment or weave structure when those details are already blurred.
Make construction readable
Inspect shoulder seams, darts, neckline, button spacing, pocket placement, sleeve length, print position, hardware, and hem shape. Clean edges between garment, hair, hands, and background help prevent temporal flicker.
Avoid ambiguous mid-motion poses
A dress frozen halfway through a spin leaves direction, timing, and final pose uncertain. Prefer stable source poses with balanced weight and visible limbs, then request one bounded action.
Match the movement to the material
Flowing dresses, scarves, wide sleeves, and loose hair can support subtle environmental movement. Structured coats, fitted garments, stiff denim, and precise tailoring usually need smaller body and fabric changes.
Step 2: Set a Motion Budget
Motion budget is the decision that most directly affects whether the clip remains usable. Answer three questions for every shot:
- What moves? Choose one or two main drivers: the model, garment, hair, or background.
- How much? Define a gentle sway, small step, slight turn, or narrow camera move.
- What stays fixed? List the product details that will be compared during QA.
A small weight shift asks the model to invent less than a 180-degree turn. A locked camera with one subtle garment movement is safer than a body spin, hair gust, orbiting camera, and lighting transition combined in the same short clip.
Conservative motion often looks more premium because it gives the viewer time to read the product. Begin with the version most likely to preserve the garment; test a higher-energy variation only after that version passes.
Step 3: Structure Prompts Around Motion and Preservation
A practical prompt has four parts:
- Subject anchor: refer to the model or garment already visible in the source.
- Motion instruction: name one concrete, bounded action.
- Camera behavior: lock the camera or select one slow move.
- Preservation constraints: name the two or three product features that matter most.
For example:
The model shifts weight gently from one foot to the other. The coat hem moves slightly and loose hair responds to a soft studio breeze. Lock the camera with a very slow push. Preserve the coat silhouette, lapels, four-button spacing, shoulder seams, hem length, and neutral camel color. Do not add accessories or change the outfit.
The instruction describes motion and protects construction. It does not invite new styling, a different set, or a redesigned garment.
Prompt Templates for Common Fashion Clips
Adapt every template to the actual source. These are starting structures, not guarantees.
Full-body lookbook
The model makes a small weight shift and settles into the next pose. The visible hem moves softly and returns naturally. Use a fixed camera with a shallow push. Preserve the exact garment color, silhouette, seams, closures, hem length, footwear, and accessories. Restrained elegant motion; no restyling or added objects.
Close-up textile detail
Macro view of the garment in the source. Soft light travels slowly across the fabric while the material moves only slightly. Keep the camera fixed. Preserve weave, stitching, print placement, edge construction, and color. No new folds, trim, or decoration.
Studio ecommerce clip
The model turns only a few degrees toward the camera and holds. The garment follows with subtle natural motion. Plain studio background, stable light, locked camera. Preserve neckline, fit, button spacing, sleeve length, print, and product color. No outfit change.
Editorial street style
The model takes one slow step forward. The coat hem and hair respond naturally. Fixed camera with a restrained documentary feel. Preserve face, outfit silhouette, pattern placement, footwear, and accessories. Do not add people, vehicles, signs, or wardrobe changes.
Run these prompts from an image-to-video workspace, starting with short takes and the lowest useful motion complexity.
Plan Aspect Ratio and Safe Zones First
Choose the real destination before generation. Creating one wide clip and assuming every vertical crop will work can remove the neckline, print, hem, or footwear you need to sell.
- 9:16: Reels, Shorts, and vertical placements. Keep face, neckline, prints, and shoes away from interface-heavy edges.
- 4:5: Feed placements and on-model product stories. This often preserves more of the silhouette while using mobile space efficiently.
- 16:9: Website heroes, campaign pages, presentations, and landscape placements. The environment has more room, but the garment may occupy less of the frame.
Leave crop margin around the body and preview motion inside the actual destination. If one source must support several formats, prepare destination-specific crops before generation rather than forcing one compromised master to do every job.
Step 4: Generate a Small Learning Batch
Do not process an entire collection before learning how the current model treats one representative item.
Use this small-batch loop:
- Select two or three strong photos of one look: a full-body view, a construction detail, and optionally a campaign frame.
- Generate two or three restrained motion variations from each source.
- Reject obvious product drift before wider creative review.
- Compare the remaining clips with the source at full size.
- Record source, prompt, model, settings, aspect ratio, and acceptance or rejection reason.
- Reuse the strongest recipe only for similar garments.
- Test again whenever fabric, structure, pattern, or silhouette changes.
Model availability, duration, resolution, aspect-ratio controls, audio options, and credit costs may change. Confirm live controls and displayed cost before submitting a batch.
The goal is a recipe that survives product review, not the largest number of generated clips.
Frame-by-Frame QA: Check the Product, Not Only the Mood
Place the source beside the result. Scrub the complete clip, then pause at the first frame, several intermediate points, and the final frame. Check at normal speed and full resolution.
Face and hands
Look for identity drift, asymmetric eyes, fused fingers, new hands, missing fingers, or hands that enter from nowhere. Do not hide a failed hand behind fast editing when the clip appears on a product page.
Seams and silhouette
Compare shoulder lines, waist shaping, side seams, darts, lapels, collar, pockets, and hem outline. Make sure the garment has not changed length or structure as the body moves.
Buttons, zippers, and hardware
Count them. Check spacing, attachment points, shape, scale, and finish. Hardware that duplicates, slides, or disappears is a product error.
Prints and patterns
Watch motifs for sliding, stretching, rotation, scale changes, or newly invented repeats. Printed fabric is especially sensitive to large deformation and camera travel.
Proportions and fit
Compare sleeve length, neckline depth, shoulder width, waist, hem length, and overall ease. A smooth clip may still make the garment appear tighter or longer than the real item.
Accessories
Confirm that earrings, belts, bags, shoes, and jewelry do not duplicate, switch sides, or vanish. Remove nonessential accessories from the source when they make review harder.
Background edges and shadows
Check racks, walls, floors, backdrop curves, and shadows around the silhouette. Bending edges can make the body or garment appear to change shape.
If a clip fails, diagnose the failure before generating again. Decide whether to improve the source, simplify the prompt, reduce motion, regenerate, or correct a limited non-product issue in editing.
When Logos and Product Text Must Be Exact
Do not rely on generative frames to reproduce small logos, labels, slogans, or repeated brand patterns. If a mark is commercially or legally important, plan a post-production solution using the original brand asset.
A flat logo on a stable surface may support planar tracking. A mark on bending cloth may require mesh tracking, rotoscoping, or a conventional product shoot. It is not automatically a quick overlay.
When exact construction, logo placement, fit, or garment movement is the sales claim, real product footage should remain the source of truth. Use generated clips as campaign concepts or atmospheric additions, and label them appropriately if customers could mistake them for verified product motion.
Common Failures and Practical Fixes
Seams ripple or melt
The motion budget is probably too high for the garment structure. Reduce the body turn, shorten the clip, or lock the camera so fewer changes must be solved at once.
A print shifts between frames
State print placement as a preservation constraint and reduce fabric deformation. Reject the clip if the product no longer matches the source; a smooth moving pattern is still inaccurate.
Hair or fabric flickers
Fine strands and folds can become temporally unstable. Simplify the motion and choose a source with cleaner separation between hair, garment, and background.
The outfit is redesigned
The prompt may describe a new fashion concept instead of movement. Remove styling language and return to the source garment as the anchor. Specify what moves and what construction must stay unchanged.
The face or hands fail
Reduce pose change, use a sharper source, or choose a crop that does not make an unstable hand the focal subject. When product pages show a model, identity and anatomy are part of presentation quality.
Color or fit changes
Stabilize lighting, reduce camera movement, and compare the source under the same color-management conditions. If fit changes materially, reject the clip instead of treating it as creative variation.
A Practical Batch Plan for a Small Brand
For a compact lookbook and one week of social assets:
- Choose three representative looks, not the full collection.
- Prepare one full-body and one genuine detail source per look.
- Test two restrained prompts per source.
- Run product-accuracy QA before creative editing.
- Build destination-specific crops only from approved masters.
- Add exact text and logos in post-production.
- Measure which placement benefits from motion.
- Expand to the next garment group only after one recipe survives review.
This learning batch is small enough for careful comparison and prevents one bad prompt or motion strategy from spreading across the collection.
Rights, Consent, and Product Accuracy
Use fashion photographs only when you have the necessary rights and model permissions for generative editing and the intended distribution. Do not animate a recognizable person without consent. Confirm photographer, talent, garment, location, and brand clearances for commercial work.
Keep the original product photo, generation settings, approved clip, and review notes together. If the generated result could mislead customers about fit, construction, color, logo, or material behavior, do not use it as product evidence.
FAQ
Can fashion photo-to-video AI replace a real video shoot?
It can add short campaign motion or test directions from existing stills. It should not replace real footage when exact construction, fit, movement, or product claims matter. Generated and photographed video perform different jobs.
What is the best source for clothing photo-to-video?
Use a sharp, well-lit, single-subject image with readable garment construction, clear separation from the background, a stable pose, and enough room for the intended motion and crop.
Why does the outfit change between frames?
Each moment is generated probabilistically, so the model may reinterpret details as the subject moves. Smaller motion, clearer source evidence, explicit preservation constraints, and strict QA reduce risk but cannot guarantee fidelity.
Which aspect ratio should I use?
Start with the destination: 9:16 for vertical placements, 4:5 for feed-focused on-model content, and 16:9 for wide website or presentation use. Preview the clip with destination overlays before delivery.
How do I guarantee that a logo stays exact?
Generation alone cannot guarantee it. Use the original brand asset in post-production when tracking is practical, or capture the real garment when a deforming surface makes exact replacement unreliable.
Conclusion
Fashion photo-to-video AI works best as a controlled production workflow: strong sources, conservative motion, preservation-focused prompts, and product-level frame review. Start with one look, learn what the current model preserves and where it drifts, and save the settings and rejection notes.
Once one clip survives direct comparison with the source, you have a recipe worth testing on the next similar garment—not permission to automate the entire collection without review.