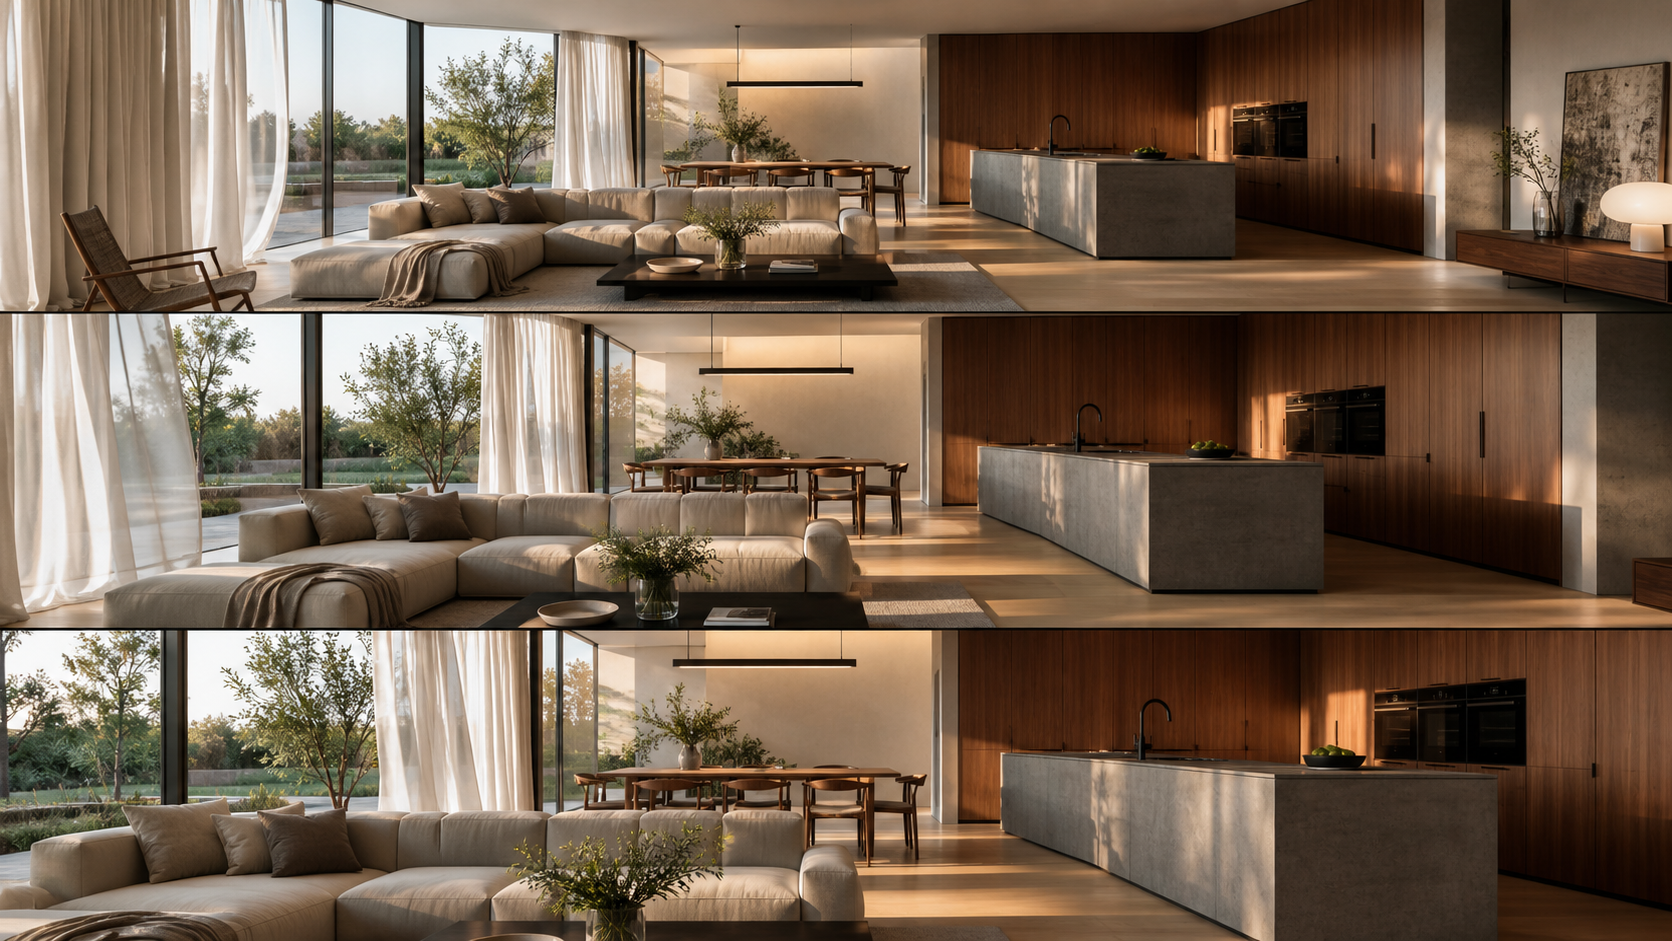
Architecture render-to-video AI can turn one finished still into a short motion concept without rebuilding a complete camera path in a 3D package. For architects, interior designers, visualization teams, and property developers, that motion can communicate atmosphere, weather, changing light, and the intended experience of a space.
It is also easy to ask too much of a single image. A generated clip cannot discover verified geometry behind a wall, confirm a hidden room, or preserve every dimension automatically. The most useful workflow treats AI video as a pre-visualization and communication layer while keeping the native 3D model, BIM data, drawings, and approved stills as the source of design truth.
This guide covers when the method fits, how to prepare a source render, how to budget motion, what to put in a prompt, how to inspect every frame, and how to hand the result to a client without creating false expectations.
Where Architecture Render-to-Video AI Fits
An animated architectural still is strongest in three roles.
Reusing an approved viewpoint
The source render already contains the chosen composition, material direction, furniture arrangement, and light. A short generated take can explore motion without discarding those approved decisions.
Communicating atmosphere
Subtle curtain movement, planting, reflections, weather, or a slow transition from daylight to interior warmth can suggest how a space may feel. This is experiential storytelling, not a claim that the finished building will behave exactly that way.
Testing presentation ideas
A team can compare a locked shot, a slow push-in, a detail pan, and a short walkthrough before investing in a native 3D animation. The generated tests help decide which camera idea deserves more production work.
The limits are structural. A model starting from one view has no verified information about hidden surfaces. During generation, walls, windows, furniture, landscaping, materials, reflections, and apparent scale may shift. Never use the clip as a substitute for documentation, constructability review, dimensional verification, or design approval.
The practical division is simple: use AI video to communicate the design story; use the model and drawings to establish what the design actually is.
Prepare the Source Render
Output quality is capped by source quality. Source preparation is often the most important step and the one teams are most tempted to skip.
Choose the cleanest approved still
Start with a render that already has the correct materials, light direction, composition, and geometry. Grain, denoising artifacts, chromatic aberration, ambiguous edges, and unresolved textures invite the model to reinterpret details.
Prefer clear depth cues
Successful frames usually have readable perspective, visible floor and ceiling planes, a clear focal subject, and purposeful light and shadow. These cues help the motion model infer a restrained camera change.
A flat elevation can still support a locked atmospheric shot or small lateral move. A strong walkthrough source should give the viewer an obvious route into the frame.
Preserve material boundaries
Export a clean, appropriately sized image with crisp edges between glass, stone, wood, metal, planting, and textiles. Check the live upload limits before production because resolution and file constraints can vary.
Lock one hero element
Decide what the viewer should notice first. When three objects compete equally, the generation may choose its own focal behavior. A clear hero—an entry, island, stair, courtyard tree, facade bay, or view—makes camera direction easier to control.
Remove text from the source
Dimensions, project labels, logos, and exact typography belong in the final edit. Do not expect generated video to reproduce small text consistently across frames. Animate a clean render, then restore approved labels and branding in post-production.
Budget Motion According to Fidelity
Every second of motion gives the model another opportunity to diverge from the design. Geometry and material preservation become harder as the viewpoint travels farther.
Choose the smallest move that communicates the idea.
Locked-camera atmosphere
Keep the camera fixed and animate only restrained environmental details: planting, a curtain, shifting daylight, a reflection, or interior lights. This asks the model to invent very little off-frame geometry and is often the safest client-facing option.
Slow push-in or pull-back
Move gently along one axis toward or away from the focal subject. A shallow push can create arrival and depth while limiting how much new space must be synthesized.
Small pan or tilt
Rotate the viewpoint while keeping the main subject near the center. Keep the move short. A large pan forces the model to invent content beyond the original boundaries.
Walkthrough or dolly
Continuous forward movement creates the strongest sense of travel but also carries the most risk. Furniture placement, proportions, reflections, floor patterns, and material boundaries have more time to change. Keep the route simple and apply strict frame-by-frame review.
For many client pieces, one carefully reviewed hero walkthrough supported by several locked or slow shots is safer than one long, complex take. Variety in the edit can come from several controlled compositions rather than excessive travel inside one clip.
Plan the Aspect Ratio Before Generation
The destination determines the canvas:
- 16:9 suits presentations, proposal videos, websites, and embedded galleries.
- 9:16 suits vertical social reels and short-form mobile video.
- 4:5 preserves more horizontal context than 9:16 while filling a mobile feed.
Available ratios vary by model, so check current controls before finalizing the deliverable. If the same design must serve a pitch deck and a vertical social post, prepare destination-specific source renders. One compromised crop often weakens both versions.
Keep the hero away from unsafe edges, leave room for titles, and avoid relying on a later crop to rescue a composition built for a different format.
Write Short, Cinema-Directed Prompts
An effective architecture image-to-video prompt focuses on motion because the source still already establishes subject, composition, style, and much of the lighting.
Use this order:
- Camera and move: locked camera, slow push-in, gentle dolly, short lateral pan, or low-angle tilt.
- Moving subject: name one or two elements and describe how gently they move.
- Atmosphere: time of day, weather, light quality, and mood.
- Scene recall: restate the structural and material elements that must remain recognizable.
Start with the motion that matters most. Add detail only when testing shows it is needed. Naming ten moving elements at once increases the fidelity risk.
Exterior approach example
Slow, shallow push toward the house along the driveway. Trees move lightly in a warm late-afternoon breeze. Keep the flat-roofed two-story home, timber cladding, large glazing, driveway alignment, and window proportions stable and centered.
Interior push-in example
Eye-level camera with a restrained forward move through the open living area. Curtains shift slightly in soft daylight. Preserve the walnut cabinetry, low concrete island, pale oak floor, furniture layout, and room proportions.
Facade detail example
Short lateral pan across the facade. Raking sunlight reveals the stone and steel texture. Keep the camera distance stable and do not move toward the building.
Locked courtyard atmosphere example
Fixed tripod view of the courtyard at dusk. Ambient light fades slowly, warm interior lights appear, and one olive tree moves gently. Preserve the paving grid, openings, facade rhythm, and scale.
These prompts describe what should move and what should hold. They do not overload the model with a new design brief.
A Controlled Generation Workflow
Use an image-to-video workspace as an iterative production stage, not a one-click final render.
- Start short and simple. Test a few seconds of slow motion on the clearest frame.
- Check design hold. Confirm geometry, palette, materials, and lighting before increasing complexity.
- Change one variable. Alter the prompt, source frame, or motion—not all three at once.
- Scale gradually. Test a shallow push before a pan, then consider a walkthrough only if the simpler take holds.
- Keep a source log. Record the render, prompt, settings, aspect ratio, duration, and accepted result.
- Confirm live controls. Model availability, duration, resolution, ratios, and credit cost can change; check them before submitting a batch.
If two shots must begin and end on planned compositions, prepare and review both endpoint frames deliberately. Start/end-frame support varies by model, and interpolation does not guarantee architectural accuracy between them.
Frame-by-Frame Architecture QA
Play the result normally, loop it, and sample individual frames on the display used for review. A deformation that lasts only a moment may disappear at full playback speed and become obvious when a stakeholder pauses the presentation.
Proportions and scale
Compare doors, windows, ceiling height, furniture, and circulation width across the clip. Sudden widening, narrowing, inflation, or collapse indicates drift.
Structure
Check that walls, columns, floors, beams, roof lines, and openings remain aligned. Watch edge regions carefully because perspective changes can cause surfaces to bend or merge.
Facade and materials
Inspect cladding rhythm, joints, glazing, mullions, stone pattern, wood grain, and transitions between materials. Make sure one material does not dissolve into another as the camera moves.
Furniture and layout
Confirm that furniture count, orientation, and position remain stable. Repeated chairs, expanding islands, and sliding objects are common warning signs.
Reflections
Glass, polished floors, metal, and water must respond plausibly without bending the room or revealing a contradictory scene. Busy reflective glazing is especially sensitive to strong movement.
Ground, landscaping, and foreground
Quiet corners often receive less attention during generation. Inspect paving lines, planting, railings, curbs, decorative objects, and foreground occlusion for improvisation.
Text and overlays
Confirm that no source label has transformed into unstable marks. Add final titles, dimensions, and logos only after the visual take is approved.
Common Failures and Fixes
Walls, windows, or doors change
Reduce camera travel, slow the move, strengthen the instruction to preserve proportions, or switch to a locked camera. If the source has extreme edge perspective, choose a less foreshortened view.
Furniture drifts or multiplies
Simplify the scene or motion. Too many distinct objects combined with long travel increases the chance of duplication and relocation.
Materials bleed into one another
Improve material separation in the source render, shorten the shot, and reduce movement. A targeted image revision may help clean an ambiguous source boundary before animation, but the approved architectural render should remain the reference.
Reflections distort
Use lower or slower motion. Tall, visually busy glazing and polished interiors are difficult because every camera change also changes complex reflected geometry.
Scale inflates or collapses
Long dolly moves and strong perspective are frequent causes. Reframe with less edge foreshortening or replace the walkthrough with a shallower move.
The clip remains almost still
Clarify one visible motion subject or adjust the camera instruction slightly. Do not respond by asking every object to move; that trades one failure for many fidelity risks.
When a take fails, preserve the source log and change one variable. Otherwise, you will not know what actually solved the problem.
Client Review and Disclosure
Tell stakeholders plainly what they are viewing. A clip generated from a render is an animated interpretation of design intent, not an as-built record or a verified model view.
A handoff note can say:
AI-assisted motion study based on the approved still. Confirm geometry, materials, dimensions, and construction information against the native model and project documentation.
This keeps the review focused on atmosphere and presentation rather than treating a momentary sink, reflection, or facade change as an approved design revision. If contractual accuracy matters, obtain qualified project-specific guidance rather than relying on a visualization disclaimer alone.
A Small Production Plan
For one pitch or submission video:
- Decide the deliverable and aspect ratio.
- Choose one hero still and one or two supporting stills.
- Remove text and repair source-frame artifacts.
- Write three or four bounded camera prompts: walkthrough, push, detail, and atmosphere.
- Generate short takes and select the strongest structural result.
- Iterate by changing one variable at a time.
- Audit every approved take frame by frame.
- Add titles, dimensions, and logos in post-production.
- Edit the controlled shots into a concise sequence.
- Deliver with a clear disclosure and the native design references available.
For multiple viewpoints, map the final sequence first so each generation has one clear job. Do not create random motion tests and hope they assemble into a coherent presentation later.
FAQ
Do I need the 3D model to create an AI motion study?
No. The generation can start from a 2D render. However, the native model, drawings, and BIM data remain the accurate references for geometry and dimensions.
Can I use this for construction-phase deliverables?
Treat it as communication and pre-visualization, not documentation. It cannot verify hidden geometry or replace design and construction records.
What does it mean that the generator may change my design?
Any frame may alter walls, windows, doors, furniture, materials, planting, reflections, or apparent scale. Careful QA reduces the chance of publishing a visible error but cannot turn generated frames into verified documentation.
Can one render produce accurate views from other angles?
No. A single perspective does not contain reliable hidden geometry. If you need several accurate viewpoints, render them from the native 3D model and use each approved still as the source for its own controlled shot.
Conclusion
Architecture render-to-video AI is a communication tool, not a replacement for the model, drawings, or design approval. Its value is the near-future feeling it can add to an approved still: a gentle approach, a moving curtain, planting in a breeze, or afternoon light crossing a floor.
Choose a clean source, budget motion honestly, direct the camera more than the effects, inspect every frame, and disclose the deliverable’s limits. Start with one short, reviewable shot. The reusable asset is not only the clip—it is a documented process that keeps architectural storytelling separate from design truth.