Beginner-friendly should not mean “press one button and hope.” A good anime maker removes technical barriers while keeping the important creative choices visible. You should be able to understand why one result works, repair a weak detail, reuse a character, and move toward a finished scene without learning five unrelated applications on day one.
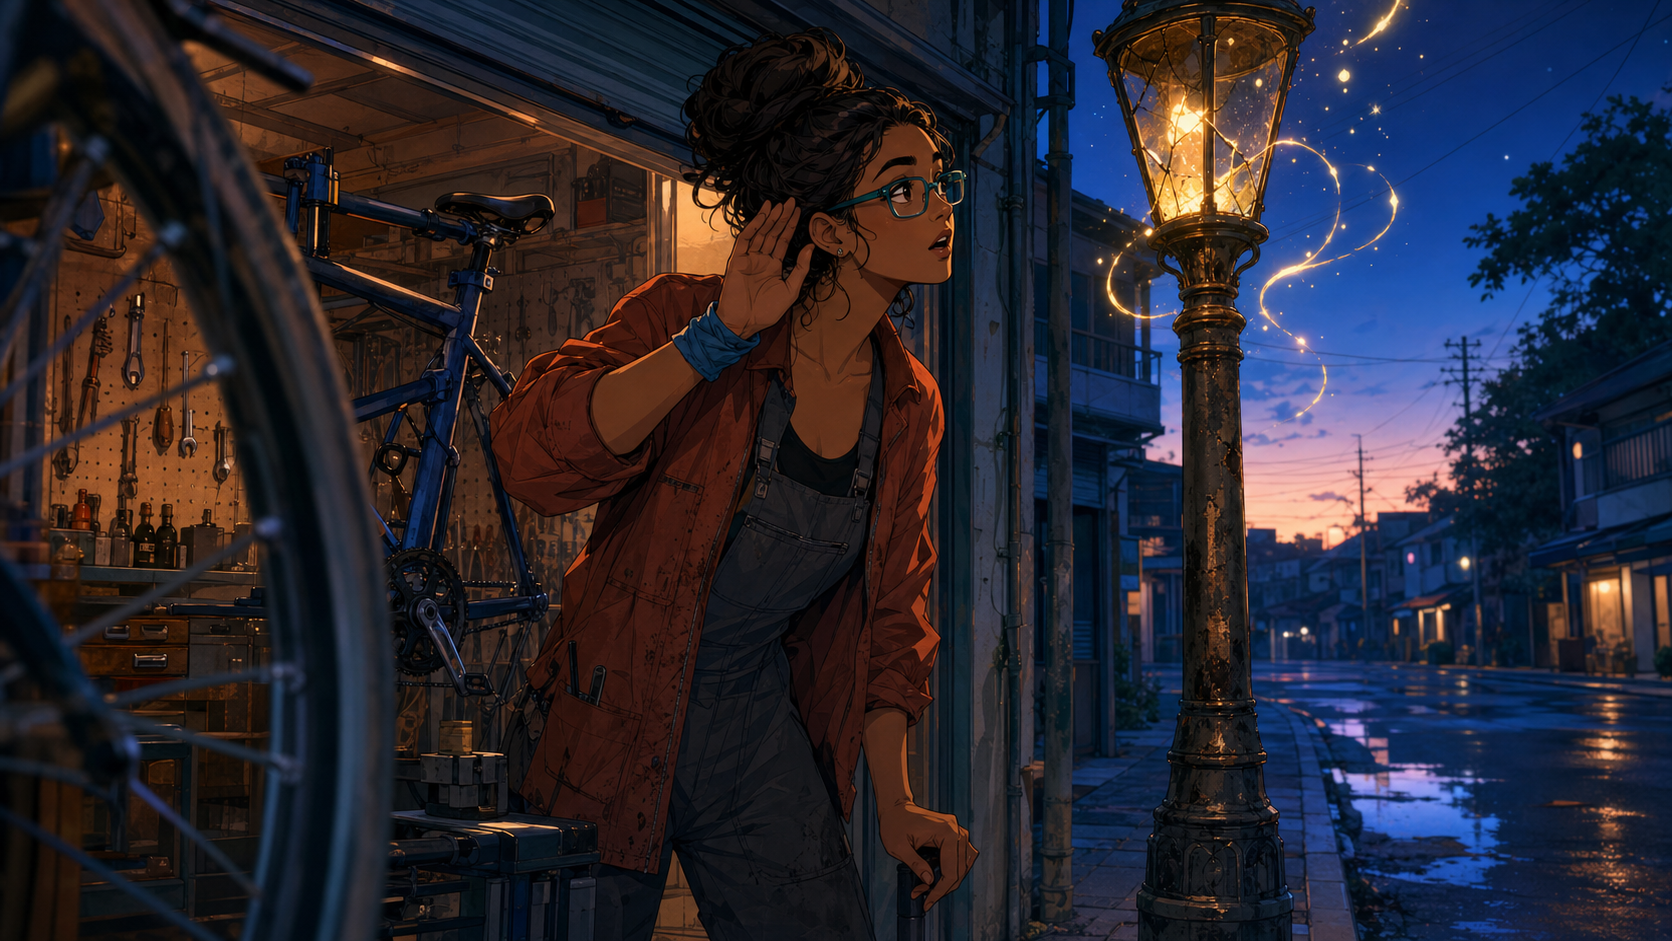
This guide uses a small test project: Mara, an adult bicycle mechanic who hears music coming from a broken streetlight. The goal is one finished scene—not a trailer or series—plus a reusable character asset and a clear way to judge whether an anime maker suits you.
What beginners actually need from an anime maker
Ignore the longest feature list. Look for five practical qualities:
- A clear starting path. You should be able to begin from a short idea, text prompt, or permitted reference without understanding model architecture.
- Reusable characters. A creator quickly outgrows a tool that makes a different face in every scene. Saved character assets or strong reference controls matter.
- Visible control. Aspect ratio, camera, style, references, and revision controls should not be buried behind a randomize button.
- Simple repair. The workflow should let you revise a useful image without discarding everything that already works.
- A route beyond the first image. Comics, storyboards, animation, and editing become relevant as soon as you want to tell a story.
The easiest tool is not necessarily the one with the fewest controls. It is the one that makes cause and effect understandable: you can change one input, compare the result, and learn.
Start with a “character sentence”
Do not start with appearance. Start with a person doing something:
Mara is an adult bicycle mechanic who can repair anything except the enchanted streetlight outside her shop.
This sentence defines role, competence, conflict, location, and a hint of magic. It gives you more direction than “cool anime mechanic with glasses.” A good character sentence should imply an action you can show in one frame.
Keep the first project narrow. One adult character, one location, one unusual event, and one finished image create enough constraints to learn without overwhelming the generator—or the person directing it.
Translate personality into design
Mara needs practical clothing because she works with grease and moving parts. Her silhouette should read clearly while crouching beside a bicycle. Her private interest in the streetlight’s music can appear as a compact audio recorder clipped inside her tool belt.
Turn those reasons into a neutral character prompt:
Clearly adult woman in her early thirties; broad shoulders; warm brown skin; dark hair in a high wrapped bun; rectangular teal glasses; cropped rust-orange mechanic jacket over charcoal coveralls; heavy work boots; blue cloth tied around the right wrist; compact audio recorder on the left side of the tool belt; full-body three-quarter character design, relaxed stance, plain background, clean cel shading, no text.
Generate a small batch with the same prompt. Choose the design with the clearest silhouette and most repeatable identity rather than the most dramatic pose. Save the approved reference and write down the fixed anchors: hair silhouette, glasses shape and color, jacket, wrist cloth, and recorder position.
Build the location separately
The finished scene takes place outside Mara’s repair shop before sunrise. Design that setting without the character first:
Narrow neighborhood bicycle-repair storefront, metal shutter half open, hand-painted sign without readable text, repair stand near the doorway, old iron streetlight at the curb, damp pavement, quiet pre-dawn blue light, warm workshop glow from inside, clean anime background painting, wide composition.
Separating location design from character design prevents the scene prompt from becoming a negotiation among too many unknowns. It also gives you a reusable background reference and a chance to decide where the action can happen clearly.
Compose the scene with three layers
A readable scene has foreground, subject layer, and background:
- Foreground: a blurred bicycle wheel entering from the lower left, adding depth without competing for attention.
- Subject layer: Mara crouched between her open toolbox and the streetlight, listening rather than merely posing.
- Background: the half-open shop, repair stand, damp street, and quiet neighborhood.
Make the magical light the brightest element and use Mara’s gaze and hand position to direct the eye toward it. The shop’s warm interior can connect the two subjects, while the blue pre-dawn street separates their silhouettes.
This is a good moment to use a text-to-image tool with the approved character and location brief. Generate four comparable variations before changing the instructions.
Learn the difference between “retry” and “revise”
Retry when the camera is wrong, the action is unreadable, the character is unrecognizable, or the scene has no focal point. Those are structural failures. A local edit cannot rescue a frame whose basic visual logic is wrong.
Revise when the image works but the glasses changed color, the recorder is malformed, one hand needs repair, or the light effect is too strong. Those are local failures. Preserve the good composition and name only the changes required.
For example:
Keep Mara’s pose, camera, storefront, toolbox, streetlight, and overall color balance unchanged. Restore rectangular teal glasses and the blue cloth on her right wrist. Repair the recorder on the left side of the tool belt. Reduce the magical light by twenty percent. Add nothing else.
This distinction saves time and teaches you to diagnose an image instead of reacting to it.
Add story polish after visual polish
Once the still image works, ask what happened immediately before and what will happen next:
- Before: Mara thought the light was an ordinary electrical fault.
- Now: she realizes the sound changes when she touches the lamp housing.
- After: she records the melody and discovers it matches a tune from a forgotten neighborhood festival.
You do not need to show all three beats. They help you choose the expression, gesture, prop, and lighting for the current frame. They also give you a natural next panel or motion shot if the story continues.
If you animate the approved still, request one readable action—Mara tilts her head toward the melody while the lamp flickers—instead of combining several gestures, camera moves, and environmental changes. A focused image-to-video pass is easier to review for continuity.
Know when your scene is finished
An AI image can be regenerated forever. Use a definition of done:
- Mara is immediately recognizable from the character sheet.
- Her action and attention are readable at thumbnail size.
- The streetlight is clearly the focal point.
- Required props and identity anchors are present.
- Hands, glasses, tools, and background geometry survive close inspection.
- The crop works for the intended destination.
- Any lettering is added in an editable layer.
- You have saved an approved master and documented the prompt and revisions.
Stop when the image communicates the beat cleanly. More detail is not automatically more story.
Safety, rights, and authorship
Use original characters or references you created, licensed, or have permission to transform. Do not upload private photographs casually. If a recognizable person inspires the character, get consent and avoid deceptive, humiliating, intimate, or otherwise harmful use.
Describe broad visual techniques rather than demanding the exact style of a living artist. “Clean cel shading, muted urban palette, softly painted background” gives useful direction without turning imitation into the product. Keep records of your selections, edits, paint-over work, and final composition.
Frequently asked questions
What is the easiest anime maker for a complete beginner?
Look for a clear prompt interface, reusable-character workflow, understandable revisions, and a path into stills or motion that matches your goal. Test the tool with one small brief instead of choosing from a feature list alone.
Should a beginner use text or a photo?
Text is safer for creating a fully original character. A photo can help with likeness or pose, but it introduces consent, privacy, and identity considerations. Upload recognizable people only with appropriate permission.
How many images should I generate before choosing?
Start with one batch of four using the same brief. Compare them, choose the strongest structure, and revise it. Generating fifty options often makes the decision harder.
Can I make anime without any art software?
You can make a first image in a browser-based AI tool. A basic editor soon becomes useful for cleanup, lettering, color correction, cropping, and exporting polished work.
Conclusion
The best anime maker for beginners is the one that helps you understand and finish a small creative decision. Start with a character sentence, turn personality into justified design anchors, build the location separately, compose the scene in layers, and learn when to retry versus revise.
Finish with your own edits and a clear export checklist. Once you can carry Mara—or another original character—from one sentence to one readable scene, you have a workflow that can grow into comics, storyboards, and animation. Explore DeepFake when you are ready to test that workflow with your own small brief.