
An AI influencer is not just a polished portrait with a username. A convincing virtual creator needs a recognizable identity, a repeatable visual world, a reason for people to follow, and a publishing system that can survive beyond the first week.
The face matters, but consistency extends further. The character should return with the same personality, wardrobe logic, voice, values, locations, and point of view. When every post looks like a different person in a random setting, the account feels like a gallery of generations rather than a creator with a life.
This guide turns the entire process into a practical workflow. You will define the audience and niche, design an original adult character, lock the visual identity, build reusable assets, produce stills and videos, plan a content calendar, measure performance, and establish ethical rules before monetization.
What You Need to Build Before You Post
A durable AI influencer has five connected systems:
- Identity: one recognizable fictional person with stable facial and physical features.
- Positioning: a clear niche, audience, promise, and personality.
- World: recurring outfits, locations, props, colors, and supporting characters.
- Production: repeatable workflows for images, video, voice, captions, and quality control.
- Trust: transparent disclosure, documented asset rights, and firm boundaries around real likenesses and endorsements.
If one system is missing, the weakness usually appears later. A beautiful character without positioning runs out of ideas. Strong concepts without identity control produce a feed of lookalikes. High output without disclosure can damage trust just as the account begins to grow.
Step 1: Choose a Niche and Audience
Start with what the character does for the audience—not what the character looks like. “Fashion influencer” is broad. “A fictional minimalist stylist who builds five-piece travel wardrobes for young professionals” provides a useful editorial filter.
Write four short statements:
- Audience: Who should care?
- Promise: What do they consistently learn, feel, or discover?
- Lens: What makes this creator's perspective distinctive?
- Boundary: What topics or partnerships do not fit?
A focused niche creates natural content pillars. A virtual food traveler might publish neighborhood guides, ingredient explainers, recipe experiments, and packing tips. A fictional game character might publish build breakdowns, lore diaries, fan challenges, and behind-the-scenes art. The concept should support at least three recurring formats without depending on one visual gimmick.
Research real audience questions, but do not clone another creator's identity, voice, catchphrases, or appearance. Your goal is a clear market position with original execution.
Step 2: Write the Character Bible
Before generating the face, define the person. A one-page character bible keeps creative decisions consistent and gives collaborators something more reliable than memory.
Include:
- name and clearly adult age;
- cultural background and languages, handled respectfully;
- personality traits and communication style;
- expertise, interests, and believable limitations;
- facial structure, hair, build, and distinguishing features;
- signature wardrobe pieces and accessories;
- color palette and lighting direction;
- recurring locations and props;
- phrases the character may use and claims they must never make;
- disclosure wording for profiles and sponsored content.
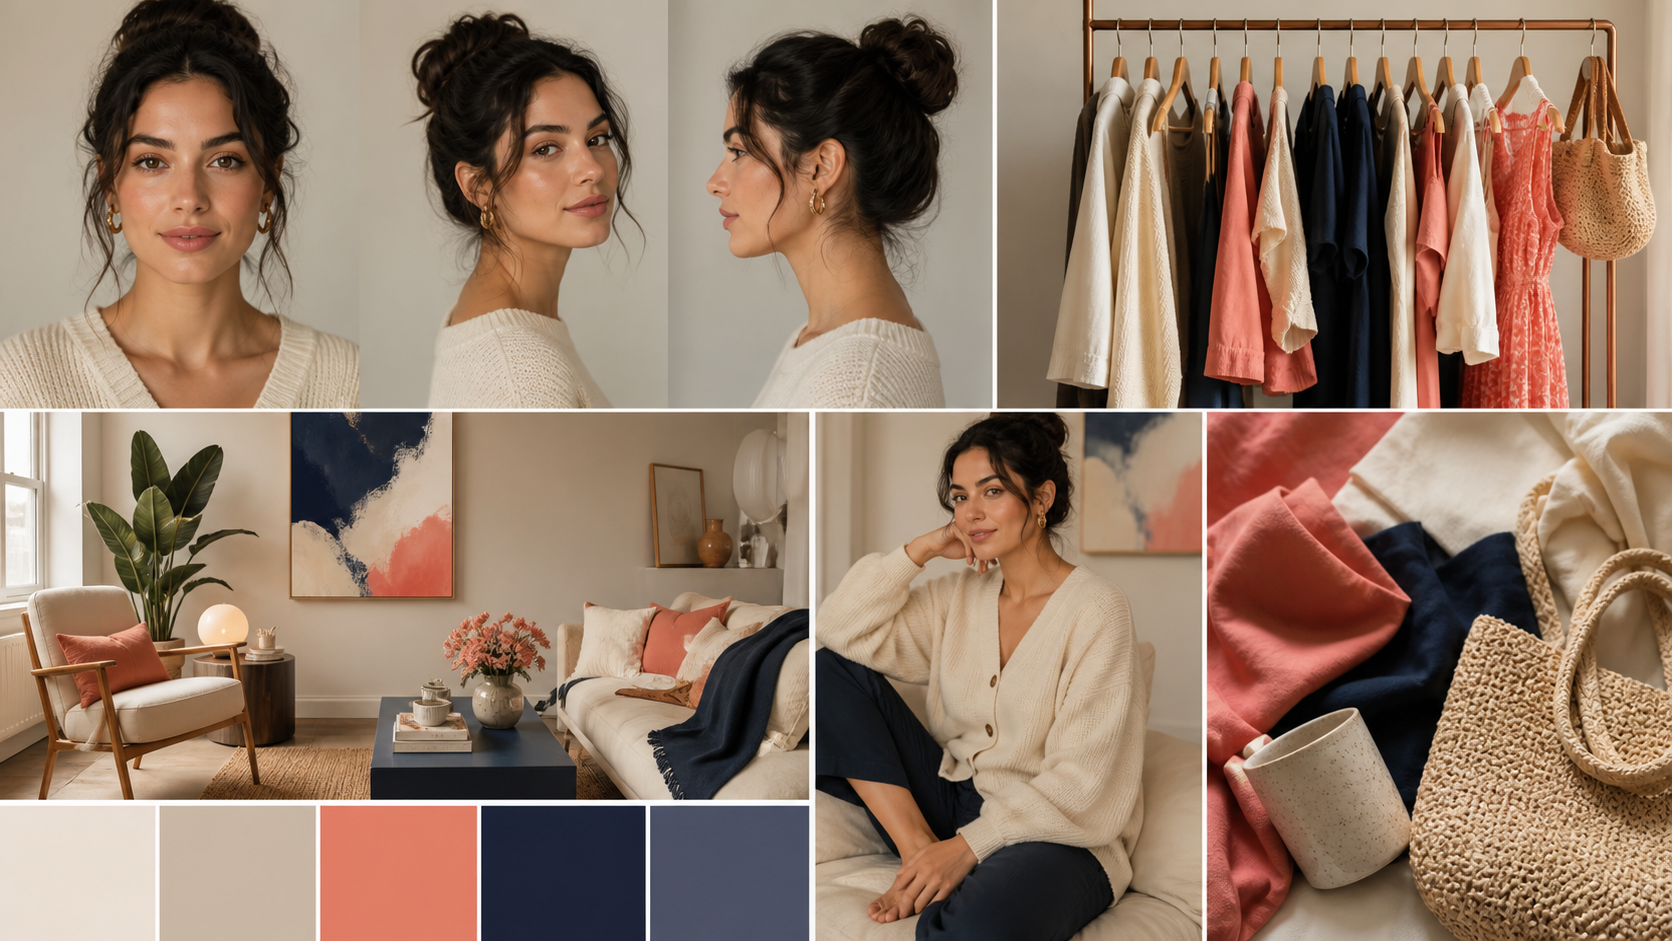
Avoid overloading the design with tiny details. Intricate jewelry, complex prints, and frequently changing hairstyles are harder to reproduce across generations. Choose two or three memorable anchors—a coral jacket, gold hoop earrings, and a warm apartment palette, for example—then let individual posts vary around them.
Personality also needs constraints. If the character is curious and optimistic, decide how that sounds when reviewing a disappointing product or correcting a mistake. Consistency under pressure feels more authentic than a list of cheerful adjectives.
Step 3: Create and Lock an Original Face
Generate several candidate portraits with a text-to-image workflow, then select one master image. The best master is sharp, unfiltered, evenly lit, and large enough to show the face clearly. A front or gentle three-quarter view is more reusable than an extreme angle.
Check the selected portrait at full resolution. Correct mismatched eyes, fused earrings, asymmetrical teeth, strange hair edges, or unnatural skin before treating it as the identity anchor. Do not build a library on top of an image you already know is flawed.
Next, create a compact identity sheet:
- front, three-quarter, and profile views;
- neutral, smiling, thoughtful, and surprised expressions;
- chest-up and full-body framing;
- consistent hair, makeup, and signature accessory;
- simple neutral lighting before more stylized setups.
Some creation systems offer saved characters, subject references, multiple image references, or trained adapters. Others rely on a strong master frame for each generation. Use the method your tool genuinely supports, and test it rather than assuming that a long text description will reproduce the same person.
Step 4: Build the Wardrobe and the World
The face is only one part of recognition. Followers also notice the jacket that returns, the apartment light, the camera angle, the mug on the desk, and the visual rhythm of the feed.
Create small reusable libraries:
Wardrobe library
Start with three outfits that express the niche: everyday, professional, and event or travel. Photograph or generate each outfit against a simple background. Record garment colors, materials, silhouette, and accessories in the character bible.
Location library
Choose two or three recurring spaces. Define the layout, time of day, dominant colors, key props, and lighting. A lifestyle creator might return to a sunlit kitchen, a small studio desk, and a neighborhood café. Repetition is brand recognition, not a lack of imagination.
Pose and composition library
Save reliable poses and crops: direct-to-camera close-up, seated three-quarter portrait, product demonstration, walking profile, and overhead detail. Map each composition to a content purpose rather than generating at random.
Product and prop library
For brand or client work, use approved reference images of packaging and products. AI models can distort labels and shapes, so composite critical brand assets during editing when exact reproduction matters. Never imply that a company endorsed the character unless an actual agreement exists.
Keep naming and versioning simple. A filename such as studio-coral-jacket-front-v03 is more useful than final_final2. Store the prompt, source references, model, aspect ratio, and edit notes beside each approved asset.
Step 5: Produce the First Nine-Post Feed
Before launching, create a small collection that demonstrates range while keeping the identity stable. Nine posts are enough to reveal whether the concept has depth and whether the grid feels coherent.
A balanced starter set might include:
- an introduction and disclosure;
- a useful tip in the main niche;
- a recurring location or routine;
- an opinion or comparison;
- a process or behind-the-scenes post;
- a community question;
- a short story or character detail;
- a vertical video or motion test;
- a summary, checklist, or saveable guide.
For each post, describe subject, action, environment, lighting, composition, and emotional tone. Keep identity information tied to the visual reference. Do not ask the prompt to redesign the face every time.
Generate variations, then select with a quality rubric. Check facial structure, hands, anatomy, wardrobe continuity, product accuracy, background logic, and whether the image leaves space for captions or interface overlays. Repair localized problems through editing rather than regenerating an otherwise strong image from scratch.
Do not publish all nine immediately. Hold them as a launch buffer so you can respond to early audience feedback without breaking the schedule.
Step 6: Move From Images to Short-Form Video
An image-only character can establish a look, but motion reveals personality. Begin with one approved still and a short, controlled image-to-video workflow. Ask for a single action such as looking toward the camera, turning a page, taking a sip, or demonstrating one product.
Keep the first test close enough to judge the face, and use a locked camera. Once identity holds, expand to wider framing, walking shots, gestures, and camera movement. Build longer sequences from short takes instead of trying to generate an entire narrative at once.
For trend-inspired movement, use choreography or footage you created or licensed. Analyze the movement pattern, then reinterpret it for the character rather than copying a real creator's performance, face, audio, and styling as one package. Clear the rights to music and reference footage before commercial use.
Use a consistent shot system across a series:
- Hook: a visually clear opening action or result;
- Context: one line or shot that establishes the problem;
- Value: the tip, demonstration, story beat, or reveal;
- Payoff: a satisfying result or decision;
- Loop or next step: an ending that naturally connects to the opening or invites a specific response.
Step 7: Give the Character a Consistent Voice
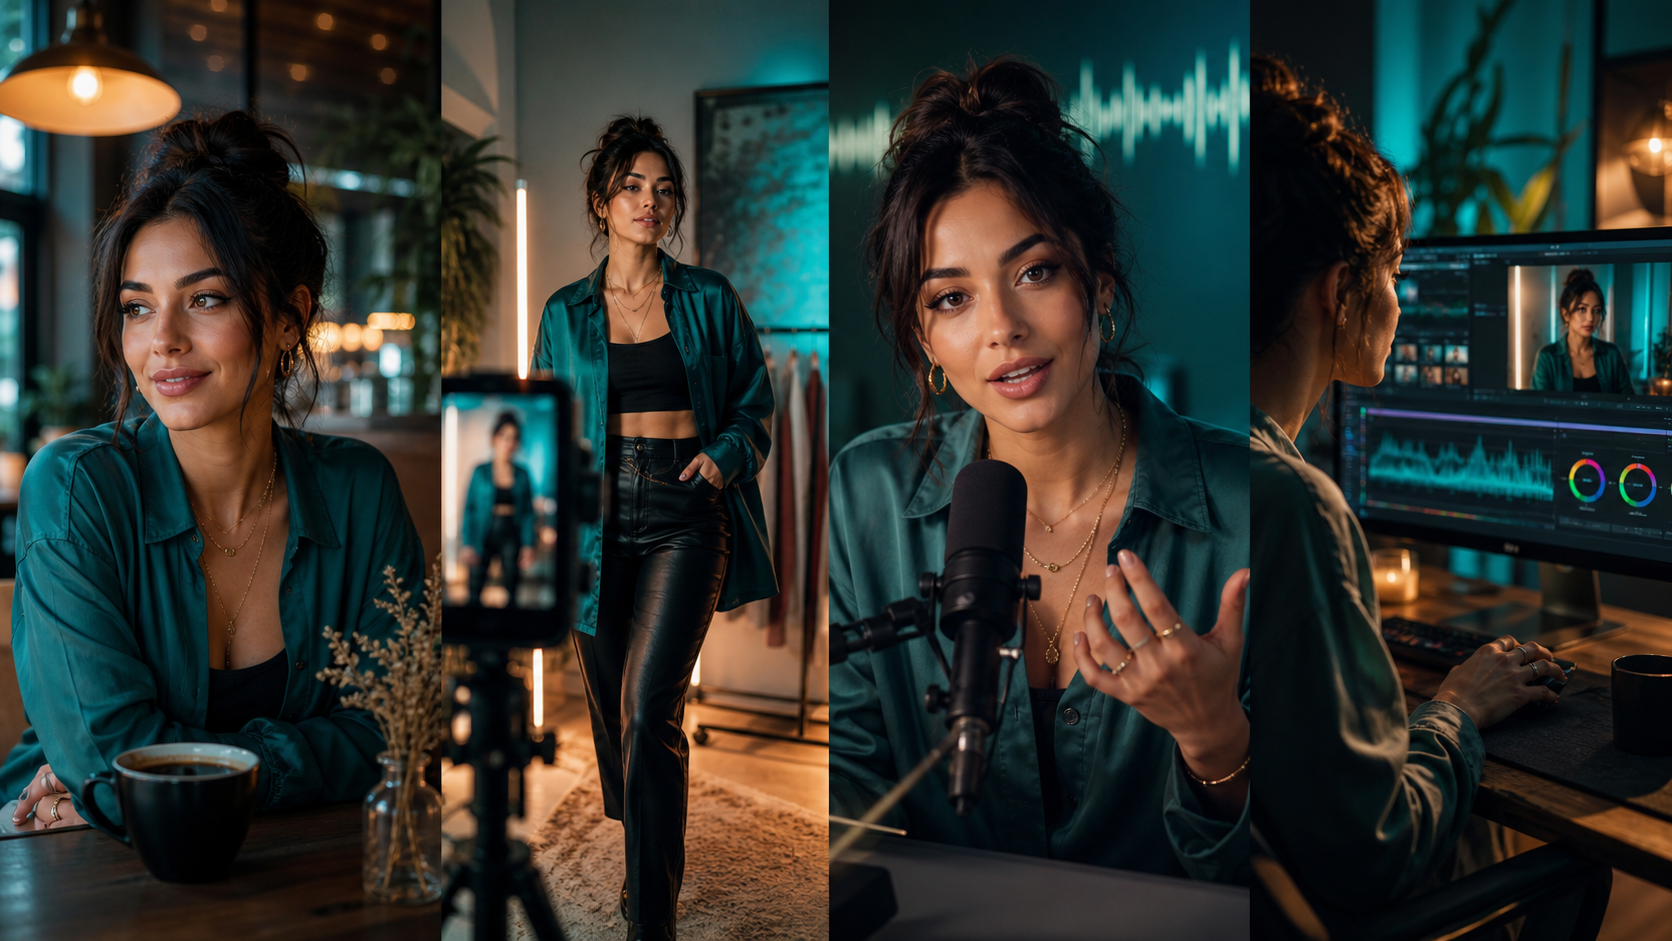
Voice turns a visual mascot into a narrator. Decide whether the character speaks through recorded talent, a licensed synthetic voice, captions only, or a combination. Obtain explicit permission for any voice sample used to create or direct synthetic speech.
Create a voice guide containing pace, pitch range, warmth, vocabulary, pronunciation, humor, and banned claims. Test the same short script in several tones. Choose a voice that fits the character's role rather than one that merely sounds dramatic.
For talking shots, record or synthesize clean speech first, then apply it to an approved portrait with a lip-sync workflow. Keep the mouth visible and avoid extreme profile angles. Review teeth, lips, cheeks, chin, and eye identity throughout the full line. Split long dialogue into shorter takes if the face begins to drift.
Sound design matters beyond speech. A recurring music palette, room tone, and transition sound can make separately generated scenes feel like one world. Keep a rights ledger for every track, effect, and voice file.
Step 8: Create a Sustainable Content System
Daily improvisation creates visual and strategic drift. Plan with content pillars and production batches.
For example, a weekly schedule could be:
| Day | Content purpose | Format |
|---|---|---|
| Monday | Teach one useful idea | Carousel or concise video |
| Tuesday | Show character life or world | Lifestyle still with story caption |
| Wednesday | Demonstrate a process | Short tutorial video |
| Thursday | Invite participation | Question, poll, or challenge |
| Friday | Offer an opinion or comparison | Talking clip or annotated image |
| Weekend | Develop narrative and community | Behind-the-scenes, recap, or live-format experiment |
Batch work by production type. Write hooks together, generate stills together, animate selected images together, record voice together, and edit exports together. This reduces context switching and makes continuity problems easier to spot.
Maintain three queues:
- Ideas: audience questions, seasonal moments, brand opportunities, and experiments;
- Production: approved concepts with scripts, references, and asset owners;
- Ready: reviewed posts with captions, disclosure, alt text, rights status, and publish date.
A high-volume pipeline still needs human selection. More generations should create more choices, not lower the threshold for publication.
Step 9: Publish Transparently and Learn From the Audience
The account bio should clearly state that the character is virtual or AI-generated. Put disclosure where an ordinary viewer can see it, not behind an ambiguous fictional backstory. Sponsored posts need the advertising disclosure required by the platform and applicable law in addition to the AI disclosure.
At launch, track more than follower count:
- Retention: where viewers leave a video;
- Saves and shares: whether the post provides durable value;
- Comments with intent: questions, objections, and requests for the next post;
- Profile actions: whether the content creates enough curiosity to explore;
- Content efficiency: time and generation cost per approved asset;
- Consistency failures: percentage of outputs rejected for face, hands, products, or continuity.
Review results by content pillar and format. If tutorials earn saves while lifestyle portraits earn impressions, use both intentionally. Do not conclude that the face, niche, and entire strategy are wrong because one post underperforms.
Change one major variable per experiment: hook, length, subject, visual style, or posting time. Keep a weekly review document that records what happened and what the next test will isolate.
How to Monetize an AI Influencer Responsibly
Monetization should follow audience trust, not precede it. Common paths include sponsored content, affiliate links, digital products, licensing an original character for campaigns, subscription communities, and commissioned educational or entertainment content.
Before accepting money, answer four questions:
- Do you have commercial rights to the visual, voice, music, product assets, and editing elements?
- Does the platform permit the content and monetization model?
- Is the AI nature of the character disclosed clearly?
- Can every product claim and testimonial be substantiated?
Do not fabricate personal product experience, health outcomes, travel history, or financial success for a fictional character. A virtual presenter can explain verified information or dramatize a story, but it should not invent evidence. Avoid regulated claims unless qualified professionals and compliant review processes are involved.
Platform rules, licensing terms, and disclosure laws change. Check the current official policy for every service and market before launch rather than relying on an old list of “AI-friendly” platforms.
Consistency Checklist for Every Post
Before publishing, review the asset against this list:
- Does the face match the approved master?
- Are age, body proportions, hair, and signature details stable?
- Does the wardrobe belong to the established library?
- Does the environment follow the character's world?
- Is the voice consistent in tone and pronunciation?
- Are hands, text, products, reflections, and background objects plausible?
- Does the post serve one content pillar and one audience need?
- Are music, footage, products, and references licensed?
- Are AI and advertising disclosures clear?
- Could a reasonable viewer mistake this for a real person or real event?
If the last answer is yes, adjust the disclosure or concept before publication.
Frequently Asked Questions
How long does it take to create an AI influencer?
You can make a first portrait quickly, but a launch-ready creator takes longer. Allow time to define positioning, approve the identity, build reference assets, generate a content buffer, test video and voice, and document rights. The account becomes faster to operate after those reusable systems exist.
Do I need to train a custom model or LoRA?
Not always. A clear master portrait and a strong subject-reference workflow can support many short-form projects. Custom training can help when the character must appear across many angles, outfits, and settings, but it adds setup and does not replace quality control.
How many reference images should I use?
Use the smallest set that clearly communicates identity and the requested scene. More references are not automatically better; conflicting angles, outfits, or lighting can compete. Start with one strong master, then add a second view or specific wardrobe reference only when it solves an observed problem.
Can an AI influencer appear with another character?
Yes, but two identities and their interaction are harder to control. Establish each character separately, use distinct wardrobe colors, start with simple staging, and avoid face-covering gestures. Alternating close-ups are often more reliable than a complex two-person wide shot.
Can I use a real person's face or voice?
Only with explicit, documented permission and within applicable law and platform policy. Do not imitate a celebrity, private person, or creator without consent. An original adult fictional identity is usually safer and more distinctive.
How do I keep the character consistent in video?
Use the approved master as a visual reference, begin with a short low-motion close-up, keep the face visible, and inspect the full clip for identity drift. Once the test holds, build the scene from several controlled takes.
Does the character need a detailed fictional life story?
It needs enough context to guide content, but not a deceptive biography. Be transparent that the creator is virtual. Build recurring themes and narrative details as creative world-building, not as false proof of real experiences.
Final Takeaway
The strongest AI influencer is a system, not a single image. Position the creator around a real audience need, lock an original adult identity, build a recognizable wardrobe and world, and move from stills to voice and video in controlled stages. Then support the creative work with a calendar, asset ledger, analytics loop, and clear disclosure.
Consistency makes the character recognizable. Useful content gives people a reason to return. Transparency makes the project sustainable.