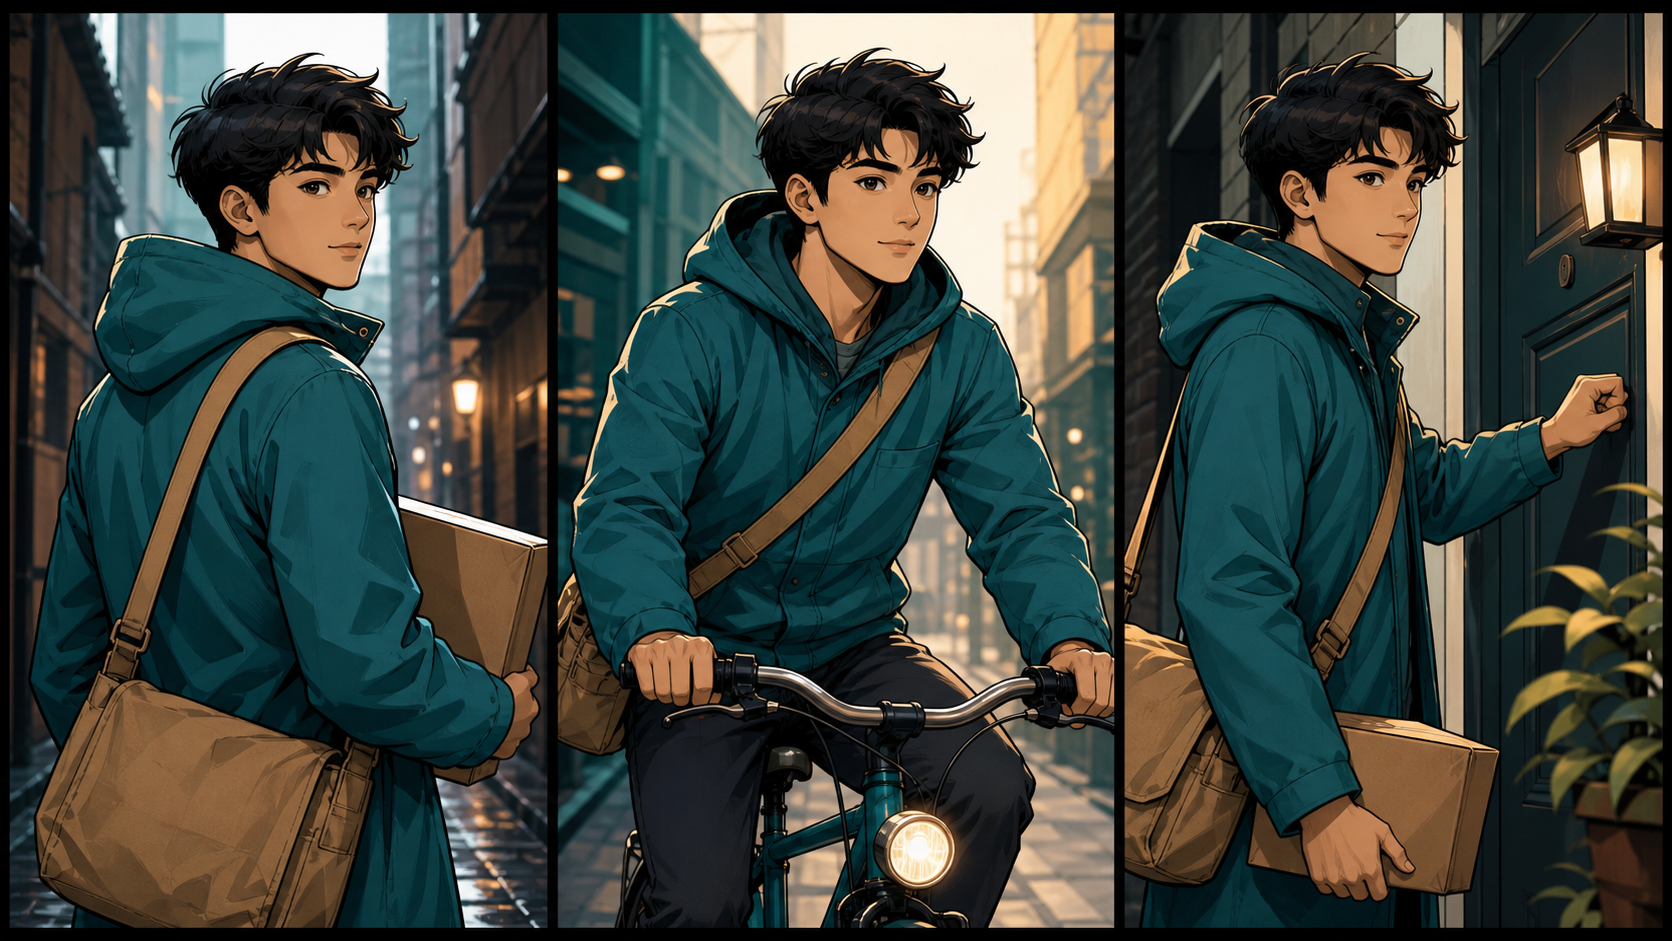
AI comic characters often drift because each panel gives the model another opportunity to reinterpret the design. A face becomes narrower, a jacket changes color, a bag disappears, or a distinctive hairstyle turns generic. The individual pictures may still look polished, but the sequence stops feeling like one story.
The solution is not simply a longer prompt. Reliable continuity comes from defining the finished deliverable, approving a stable character reference, recording what may and may not change, and reviewing panels as a sequence. This guide turns those ideas into a repeatable production method.
Start With the Result You Actually Need
The same scene may need to become a mobile comic, a printable page, a profile crop, a concept board, or a video keyframe. Each destination creates different constraints for orientation, resolution, caption space, and shot distance. Set those constraints before choosing a visual style.
Write a miniature acceptance test for the comic. A strong sequence should meet these five conditions:
- The reading order is obvious at the intended viewing size.
- Every recurring character is immediately recognizable.
- Dialogue fits without covering essential art.
- Camera choices make the action clearer.
- Every panel contributes new story information.
These checks make feedback concrete. Instead of asking for a vague improvement, you can identify whether a revision must fix character identity, composition, lettering, or story progression.
Why Character Drift Happens
Character consistency is a constraint problem. If a brief only says “the same hero,” the model still has to guess which traits define that hero. It may preserve the coat while changing the face, or match the hair while altering age and proportions.
Drift also compounds when a weak panel becomes the reference for the next one. Small errors are inherited, then exaggerated. By the fifth panel, the model may be following an altered copy rather than the approved design. The safest workflow always returns to a clean reference instead of building an increasingly distorted chain.
Build a Character Continuity Card
Once a design is approved, create a compact continuity card for it. Record visual facts that can be checked rather than subjective adjectives such as “cool” or “premium.” Include:
- Overall height and body proportions
- Face shape, eye shape, nose, brows, and other recognizable features
- Hairstyle, hairline, texture, and color
- Base palette and exact costume layers
- Footwear, jewelry, bags, weapons, or recurring props
- Distinctive marks that must remain visible
- Features that are allowed to change, such as expression or pose
Add front, side, and three-quarter views when possible. A model sheet should explain proportions as well as colors and clothing. “Short torso, long coat, narrow shoulders” is more useful than “wearing a blue coat” because it protects the silhouette that readers recognize first.
If you are exploring the design with an AI image workflow, keep the approved card separate from experiments. A text-to-image workspace can help establish visual directions, but only a deliberately selected result should become the reference for later panels.
The Working Process
1. Reduce the premise to a clear conflict
Summarize the scene in one sentence that contains a character, a goal, and an obstacle. Then specify the delivery format: platform, page size, orientation, crop, and whether dialogue must share the frame. A correct canvas and a clear conflict remove more ambiguity than adding decorative style words.
2. Break the story into visual beats
List the moments a reader must understand in order. For example: arrival, unusual sound, denial, closer inspection, revelation, and decision. Each beat should cause a visible change in action, information, or emotion.
If two neighboring beats would produce almost identical pictures, combine them. Repetition consumes space and forces the model to invent variation that may have nothing to do with the story.
3. Assign one job to each panel
A panel might establish location, introduce a clue, show a reaction, reveal danger, or resolve a decision. Do not ask one frame to perform every job at once. A focused panel is easier to compose and easier to evaluate.
Write observable art direction. Replace “make it cinematic” with a particular silhouette, lens distance, camera height, light source, palette, and relationship between the subject and the environment. Concrete instructions reduce the number of plausible but unwanted interpretations.
4. Make the visual action work before writing dialogue
Temporarily review the sequence without speech balloons. Can a reader still understand who acts, what changes, and where to look next? If the page only works after a caption explains the action, the panel may be carrying the wrong visual information.
Once the action reads clearly, add short dialogue that complements rather than repeats the picture. Reserve enough negative space early so lettering does not cover a face, hand, clue, or line of movement.
5. Generate and review panels as a sequence
Work in small controlled batches—often three or four candidates—and change one variable at a time. Compare structure before surface polish:
- Character silhouette and proportions
- Facial identity and expression
- Anatomy and garment fit
- Perspective and spatial geography
- Prop placement and handedness
- Reading order and visual hierarchy
Inspect promising panels in two modes. At full size, check anatomy, duplicated details, masks, textures, and lettering. At actual publishing size, check whether the character, action, and reading order remain immediate.
6. Repair continuity and lettering before export
Once most of a panel works, avoid regenerating the entire frame. Correct the smallest failing area—a sleeve, face, hand, prop, balloon, or background region—while protecting successful composition and lighting. An image-to-image workflow can be useful for controlled visual iteration, provided you compare every revision with the original approved reference.
Whole-frame regeneration is appropriate during exploration. Late in production, it creates unnecessary risk because every solved detail becomes variable again.
Keep a Scene Continuity Ledger
A character card protects the core design; a scene ledger tracks temporary state. For each panel or scene, record:
- Wardrobe layers currently worn or removed
- Props carried, dropped, opened, or damaged
- Injuries, dirt, weather effects, and time of day
- Character position and direction of movement
- Emotional state and what caused it
- Facts that must persist into the next beat
Turn each item into a pass-or-revise check. “Bag stays on the left shoulder until the reveal” is measurable. “Keep everything consistent” is not.
Name approved files clearly and archive them away from experiments. When a later generation drifts, you should be able to return to the original model sheet and last approved scene without searching through anonymous downloads.
A Realistic Example: The Whispering Package
Suppose the premise is: a courier discovers that a package is whispering. First, establish the courier’s height, coat, canvas bag, hair, and delivery box in the continuity card. Then break the scene into six beats:
- The courier arrives at the address.
- A faint sound comes from the package.
- The courier dismisses it and approaches the door.
- The sound becomes unmistakable.
- The courier inspects the box and discovers the source.
- The courier makes a decision.
The coat, bag, package size, and character proportions should not change simply because the camera moves from a wide shot to a close-up. Dialogue can remain minimal because posture, gaze, and distance from the box carry the story.
Review the six panels together. Remove any frame that repeats the previous information. If the fifth panel has the strongest composition but the face has drifted, repair the face from the original character reference rather than regenerating the entire page or borrowing identity from an already inconsistent neighboring frame.
This modest, finishable exercise teaches more about continuity than an elaborate prompt that produces spectacular but unrelated images.
Common Mistakes and Better Fixes
Starting from a weak reference
A small, blurry, obstructed, or dramatically lit reference leaves key features open to interpretation. Begin with sufficient resolution, clear lighting, and unobstructed facial and costume details. Approve the foundation before adding decorative complexity.
Contradicting the existing pose or camera
A reference already contains perspective, body position, and visible surfaces. Demanding impossible geometry can distort anatomy or redesign the outfit. Acknowledge the existing camera and change only what the shot can plausibly support.
Changing several variables at once
If you alter pose, costume, lighting, lens, and environment together, you will not know which instruction caused the drift. Isolate revisions so useful changes can be repeated and failures can be diagnosed.
Treating the first attractive result as final
A panel can look impressive alone yet fail inside the page. Plan a cleanup pass for continuity, anatomy, text placement, and export size. Judge the sequence in its final delivery context, not only as full-resolution images.
Referencing the previous panel instead of the original
Repeatedly feeding one output into the next creates a visual game of telephone. Anchor every important repair to the approved model sheet or character card. Neighboring panels can guide scene state, but they should not redefine identity.
Quality, Safety, and Rights
Creative speed does not remove responsibility. Confirm that you have permission to use uploaded images, reference art, characters, brands, and client materials. Avoid deceptive edits of real people, and clearly distinguish fan-made work from official material.
Commercial use depends on the platform’s current terms, local law, source licenses, and third-party intellectual property. For client work, document source assets, prompts, material revisions, approvals, and usage rights so the production trail is clear.
FAQ
Should I generate an entire comic at once?
That can work for an early thumbnail or a very short experiment. For stronger control, approve the script and character references first, then review the page panel by panel and repair weak areas locally.
Do I need professional drawing or editing skills?
No, but you do need a precise brief and the patience to inspect details. Basic knowledge of composition, continuity, lettering, and file formats usually improves results more than adding more style adjectives to a prompt.
How many versions should I generate?
Start with a small batch, often three or four candidates. If none solves the structural problem, revise the reference or instructions before spending time on more variations.
Can I use AI comic art commercially?
Possibly. Check the current terms of the tools you use and verify the rights attached to every source image, character, brand, and reference. Client work should receive a documented rights review before publication.
Conclusion
Consistent AI comic characters come from production control rather than luck. Define the deliverable, protect an approved character reference, record scene state, change one variable at a time, and inspect every panel in sequence. When something fails, repair the smallest affected region from the clean original reference. That discipline turns isolated good-looking images into reusable characters and coherent visual storytelling.