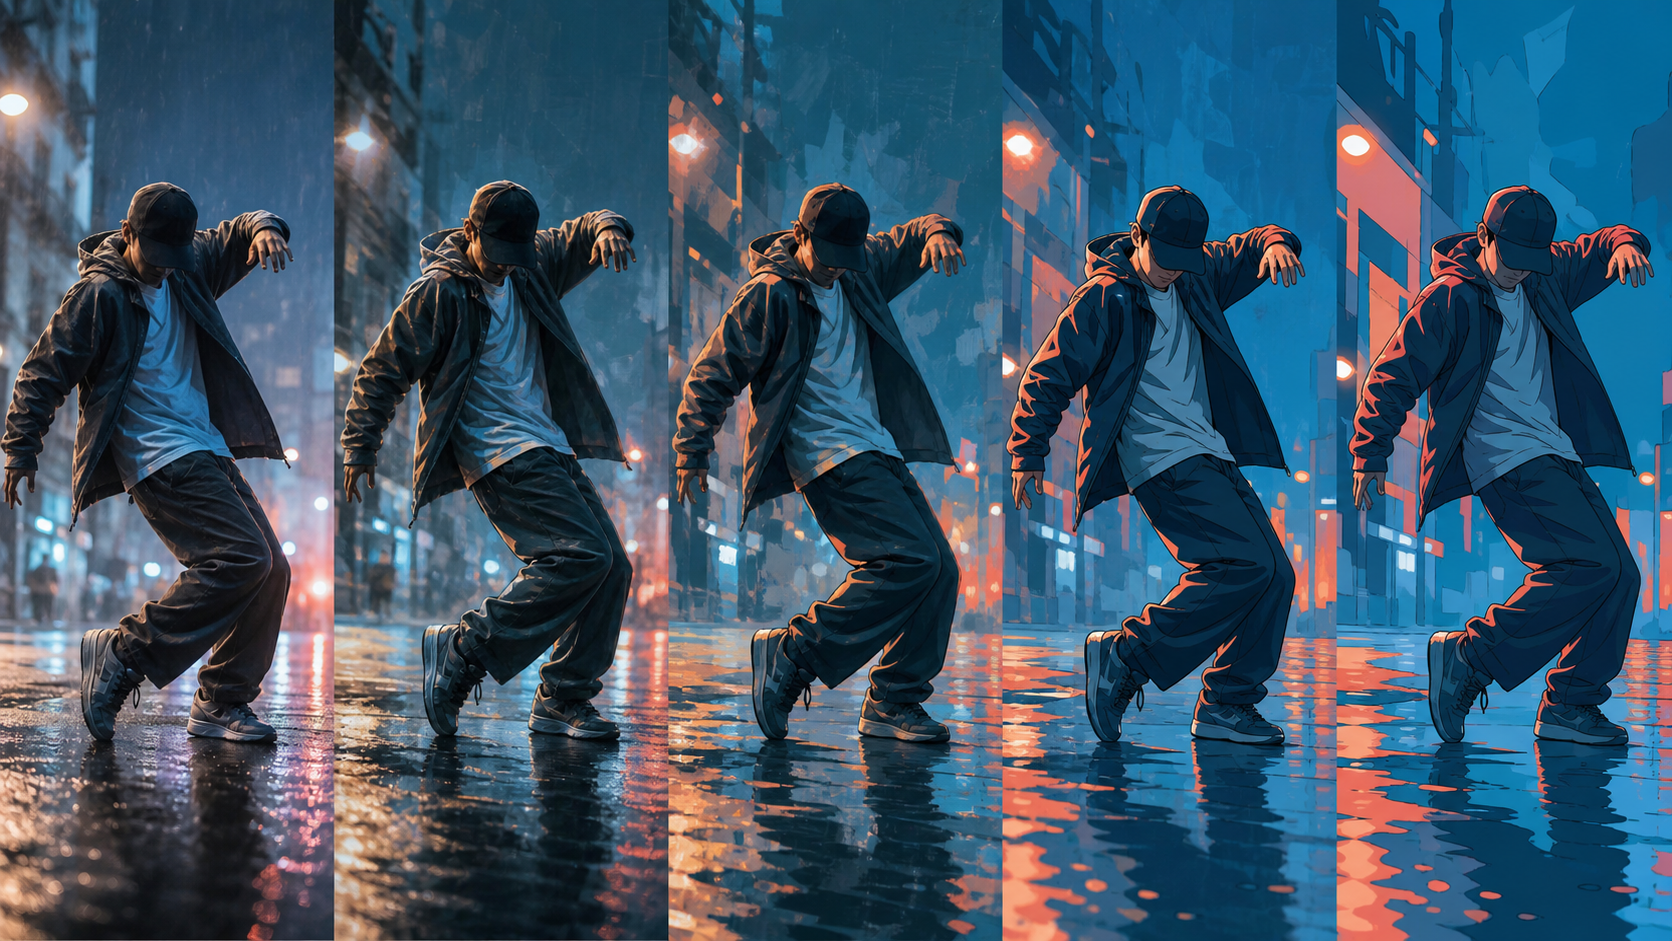
An AI video-to-cartoon converter can transform live-action movement into stylized animation, but a good result requires more than applying a preset filter. Faces must remain recognizable from frame to frame, colors should not flicker, backgrounds need stable structure, and the chosen visual style must survive motion.
Free tiers and trials are useful for testing this workflow, but their credits, watermarks, duration, resolution, and commercial rights change frequently. Check the current terms in the tool before uploading footage or planning a publishable project.
This guide explains how to prepare a clip, write a usable style direction, run a controlled conversion, diagnose common failures, and finish the result responsibly.
Video-to-Cartoon AI vs. a Cartoon Filter
A traditional filter changes color, edge contrast, or texture across existing frames. It can be fast and temporally stable because it does not deeply reinterpret the scene. The limitation is that the result often looks like processed video rather than designed animation.
Generative video-to-video tools can redraw forms, simplify materials, change shading, and apply a more complete visual language. This creates greater stylistic range, but it can also introduce:
- facial drift;
- inconsistent line weight;
- clothing details that appear and disappear;
- pulsing colors;
- warped hands and props;
- backgrounds that change layout;
- unstable text and logos.
The goal is not maximum transformation. It is the strongest style change the model can maintain coherently for the entire shot.
What Makes a Good AI Cartoon Conversion?
Judge a converted clip on five dimensions.
Identity and Shape Consistency
The subject's face, hairstyle, body proportions, clothing silhouette, and important accessories should remain stable. A stylized likeness may simplify detail, but it should not become a new person in every frame.
Temporal Stability
Line art, palette, lighting, and background detail should not flash or crawl. Watch the result at normal speed, half speed, and frame by frame around fast movement.
Motion Preservation
The output should retain the intent, rhythm, and physical direction of the source. Arms and legs must connect plausibly, feet should make contact with the ground, and camera movement should not bend the space.
Deliberate Style
“Cartoon” is too broad. Define edge treatment, shading, palette, background detail, material texture, and mood. Use original descriptive language rather than copying a named artist or franchise.
Usable Export
The clip needs the right duration, aspect ratio, resolution, frame rate, watermark status, and license for its destination. A beautiful preview is not useful if it cannot leave the platform in an acceptable form.
Step 1: Choose the Right Source Footage
Start with a short clip—three to six seconds is enough for a first test. The source should have:
- one main subject;
- clear lighting and visible edges;
- a background with understandable depth;
- limited occlusion;
- a simple camera move or stable camera;
- no rapid cut inside the clip;
- no small text that must remain readable.
Avoid beginning with a crowd, fast spinning camera, reflective glass, smoke, detailed patterned clothing, or hands repeatedly crossing the face. These elements increase the amount the model must reinterpret at once.
Use the highest-quality source you can legally process. Heavy compression creates false edges and block noise that may be amplified into the cartoon style.
Step 2: Edit Before You Convert
Trim the exact shot first. Remove frames before and after the intended action, stabilize excessive shake if needed, and correct major exposure problems.
Reframe for the final platform before generation. Converting a landscape shot and cropping it to vertical later can remove important motion or force another expensive pass.
If the clip includes a recognizable logo, license plate, private screen, or unrelated person, remove or mask it before upload. Generative stylization is not a reliable privacy tool; it may preserve or unpredictably distort identifying details.
Step 3: Write a Style Direction
Use a compact style specification rather than a franchise name.
Transform the source into original hand-drawn cartoon animation.
Preserve the same adult subject, clothing silhouette, action timing, camera path, and street layout.
Use clean dark-blue contour lines, simple two-level cel shading, a limited cyan-and-coral night palette, soft painted background detail, and stable facial proportions.
Keep hands, shoes, jacket, cap, and wet-ground reflections consistent across every frame.
No text, no logo, no new objects, no identity change, no flicker, and no exaggerated facial redesign.
Separate invariants from creative direction. The tool should know both what to change and what must remain.
Step 4: Run a Short Test
Use a video-to-video workflow or another converter that accepts your source format. Before generating, check the current model, duration, aspect ratio, cost, privacy, and export terms shown in the interface.
Generate the shortest useful segment first. Review the first, middle, and final frames for identity and scene structure. Then watch the transition between those points for flicker.
Do not spend all trial credits on high-quality settings before the style direction works. A lower-cost preview can answer whether the palette, line treatment, and transformation strength are suitable.
Step 5: Fix One Failure at a Time
AI conversion is iterative. Change one variable between attempts so you know what helped.
If the Face Changes
- shorten the clip;
- reduce transformation strength if available;
- use clearer, front-lit source footage;
- add an approved face or character reference if supported;
- request less facial detail rather than a more elaborate design;
- split the shot where the head turns sharply.
If Colors Flicker
- specify a limited palette;
- simplify patterned clothing and reflective surfaces;
- keep lighting language consistent;
- avoid combining several visual styles;
- test a more stable or lower-detail background treatment.
If the Background Warps
- stabilize or remove the camera move;
- reduce scene detail;
- mask or segment the subject if the workflow supports it;
- process the subject and background separately only when you can composite cleanly;
- split a long camera move into shorter shots.
If Hands or Props Melt
- choose source footage with clear silhouettes and less motion blur;
- avoid long occlusion behind the body;
- reduce action complexity;
- cut around the most unstable frames;
- replace a failed section with a shorter insert.
If the Result Looks Like a Filter
- define contour, shading, palette, and texture more specifically;
- increase style strength gradually;
- use a reference that you created or licensed;
- simplify the source background so the model has room to reinterpret it.
Step 6: Build Longer Videos From Shots
Do not upload a two-minute edit and expect one coherent conversion. Divide the project into shots with clear boundaries.
Create a style bible containing:
- approved frames;
- palette values;
- line and shading rules;
- character invariants;
- environment examples;
- model/version and generation date;
- prompt template;
- export settings.
Use the closest visual reference for each shot, and compare adjacent outputs side by side before editing. A consistent transition between two good clips matters more than either clip in isolation.
Step 7: Finish the Animation
Generated output still needs post-production.
- Trim unstable start and end frames.
- Retime small sections if motion feels uneven.
- Apply gentle color matching across shots.
- Repair isolated frames only when the effort is justified.
- Add sound design, music, dialogue, and captions.
- Export to the final platform specification.
- Review on a phone-sized screen as well as a large monitor.
Keep the original source, generated versions, prompt, model information, licenses, and approvals with the project.
Free Tools, Watermarks, and Hidden Limits
“Free” may mean trial credits, daily limits, low-priority queues, shorter duration, reduced resolution, non-commercial use, or watermarked export. Verify:
- whether a payment method is required;
- whether the trial renews automatically;
- how many seconds each credit produces;
- whether failed generations consume credits;
- the clean-export requirement;
- maximum resolution and frame rate;
- storage and deletion policy;
- commercial and client-use rights.
Use free access to test the workflow, not to assume a full project will cost nothing. Calculate cost per approved second, including failed generations and editing time.
You can inspect available creative options through DeepFake's model catalog, but current models and terms in the product are the source of truth.
Practical Uses for Video-to-Cartoon Conversion
Social Clips
Stylize a short dance, performance, or product moment. Preserve clear composition and caption space; do not let a complex background compete with the subject.
Music Visuals
Convert selected performance shots and cut them with conventional editing. Use consistent palette and line rules across the sequence, and license the music separately.
Educational and Explainer Content
Cartoon treatment can soften a visual and create a consistent series identity. Keep diagrams and text in post-production rather than relying on the generative model to redraw them accurately.
Previsualization
Directors can test how real blocking and camera movement might translate into a stylized project. Treat the output as a concept, not a substitute for final animation cleanup.
Original Character Content
Perform movement in simple reference footage, then translate it into an original fictional character only when the performer has consented and the design does not copy protected IP.
Responsible Use and Consent
Only upload footage you own or have permission to process. Obtain clear consent from identifiable people, especially for client, employee, child, or private footage. Do not use stylization to create deceptive impersonations, sexualized content without consent, fabricated evidence, or misleading political media.
A cartoon result can still reveal identity through face, voice, clothing, location, or movement. Review privacy and distribution rights separately from the visual style.
Final Checklist
Before exporting, confirm:
- identity and clothing remain stable;
- line, palette, and shading do not flicker;
- motion and camera direction match the source;
- hands, props, and background remain usable;
- no accidental logos, text, or private details appear;
- audio and captions are intentional;
- watermark, resolution, and license fit the destination;
- all identifiable people consented;
- the original and generation record are archived.
Video-to-cartoon AI is most effective when treated as a shot-based animation workflow. Start with clean footage, control the style, review frame continuity, and finish the result in an editor. A few disciplined tests will tell you far more than a one-click filter demo.
Frequently Asked Questions
Can I convert a video to cartoon for free?
Some products offer free credits or trials, but duration, watermarks, resolution, and rights vary. Use the free access to test a short shot and verify current export terms before committing.
Why does my cartoon video flicker?
The model is redrawing frames inconsistently. Shorten the shot, simplify the style and background, limit the palette, reduce transformation strength, and use stable references where supported.
Can I turn a full video into animation at once?
It is usually more reliable to divide the edit into short shots, convert them with one style bible, review continuity, and assemble them in post-production.
Is video-to-cartoon the same as video-to-anime?
Anime is one possible visual direction within a broader cartoon workflow. Describe original line, shading, palette, composition, and motion qualities instead of naming a protected franchise or artist.