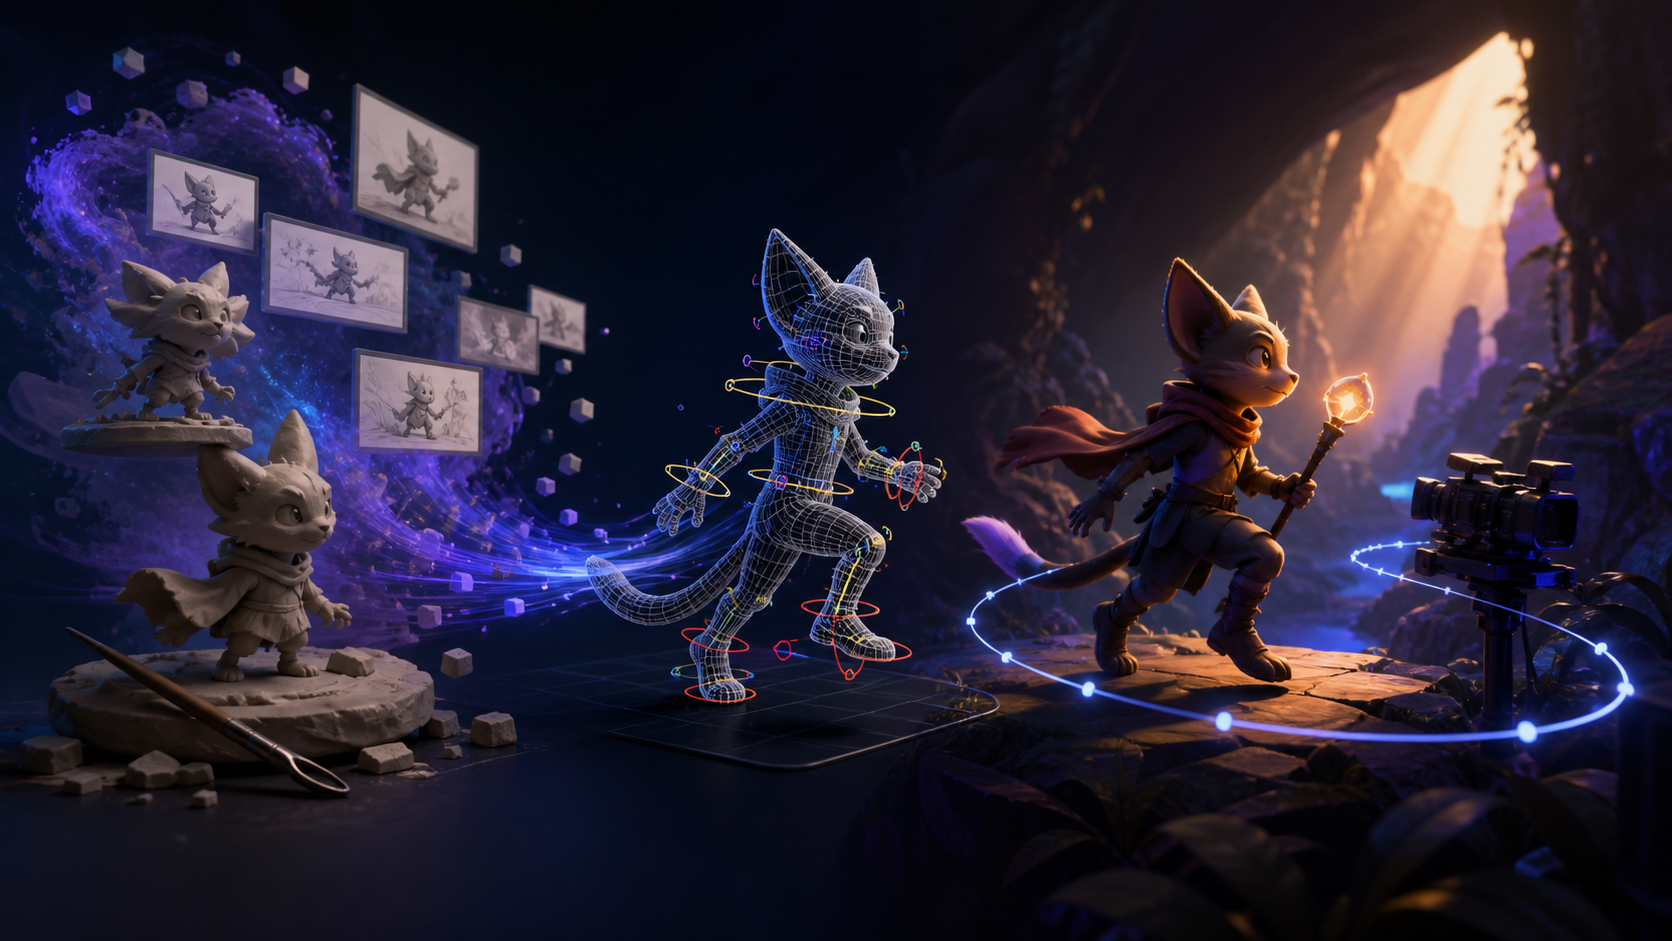
AI can make 3D animation faster, but it does not turn every idea into a production-ready 3D scene with one prompt. Its biggest advantages appear in concept development, look exploration, storyboarding, previsualization, reference creation, motion drafts, and cleanup. Exact rig behavior, repeatable camera moves, asset ownership, simulation, and frame-level revision still benefit from a conventional 3D pipeline.
That distinction leads to a much better question than “Can AI make 3D animation?” Ask what kind of result you need. A ten-second stylized clip that only has to look three-dimensional can use a largely generative workflow. A character that must perform across twenty episodes needs stable geometry, materials, a rig, scene organization, and controllable animation.
This guide shows how to choose between those goals and build a hybrid process that uses AI where it saves time without giving up control where precision matters.
Quick answer
Use AI to accelerate:
- visual research and concept variations;
- character and environment look development;
- storyboard frames and shot alternatives;
- rough camera and motion ideas;
- texture or reference exploration;
- stylized image-to-video tests;
- rotoscoping, masking, cleanup, and edit assistance;
- scripts, asset lists, naming plans, and quality-control checklists.
Keep a traditional 3D tool in the loop when you need:
- editable meshes and topology;
- repeatable skeletons, facial rigs, and constraints;
- exact object placement and camera paths;
- physically meaningful lighting or simulation;
- reusable assets across many scenes;
- precise collisions, product dimensions, or mechanical motion;
- deterministic revisions after client feedback.
For most creators, the strongest answer is not “AI only” or “manual only.” It is a hybrid pipeline with a clear handoff between exploration and controlled execution.
First decide: true 3D or a 3D-style video?
These outputs can look similar in a feed, but they are built differently.
True 3D animation
A true 3D production contains editable scene data: geometry, materials, lights, cameras, rigs, animation curves, and often simulations. You can rotate the camera, change a character's hand pose, adjust one light, or render the same action from another angle without recreating the world.
Choose this route when the project needs asset reuse, multiple shots, precise revisions, interactive output, product accuracy, or long-term continuity.
3D-style generative video
A generative clip may convincingly resemble a rendered 3D film while existing only as frames. It can be excellent for mood pieces, social posts, concept trailers, music visuals, and short narrative moments. You gain speed but lose access to the underlying rig and scene.
Choose this route when the final frame matters more than the editable 3D asset, the shot is short, and small motion variations are acceptable.
A hybrid result
Hybrid work combines both. You might block the scene and camera in 3D, render a simple pass, use generative tools to stylize or enrich it, then composite and edit the result. Or you might create AI concept frames, build only the hero object in 3D, and generate secondary atmospheric shots.
Hybrid production is often the most efficient because it spends technical effort only where control creates visible value.
A step-by-step AI-assisted 3D animation workflow
Step 1: Define the delivery target
Write a one-paragraph production contract before generating anything. Include:
- duration and aspect ratio;
- intended platform or screen;
- frame rate and final resolution;
- visual style and emotional tone;
- number of characters, props, and locations;
- whether assets must be reusable;
- required camera or object precision;
- deadline and review milestones.
The answer determines the pipeline. A six-second environment reveal can tolerate generative variation. A 60-second product assembly with labeled parts cannot.
A useful test is the revision question: if someone asks to move the camera 15 degrees and change only the left hand, can the workflow do that predictably? If not, do not promise true 3D control.
Step 2: Break the idea into shots
Do not begin with a request for an entire film. Divide the concept into beats and shots. For each shot, record:
- its narrative purpose;
- subject and action;
- framing and lens feeling;
- camera movement;
- beginning and ending composition;
- expected duration;
- continuity requirements;
- assets needed.
This shot map prevents attractive but disconnected experiments. It also reveals which moments need true 3D and which can be generated as flat video.
Step 3: Develop the visual language
Use AI image generation for broad look exploration, not final asset approval. Test variations in shape language, material response, palette, environment density, lighting direction, and rendering style.
Keep prompts visually concrete. Instead of “epic 3D fantasy,” specify:
Small fox courier in a faceted stylized 3D world, triangular silhouette, indigo scarf, warm lantern, damp stone canyon, low camera, soft volumetric backlight, restrained violet and amber palette, family-animation proportions.
Change one category at a time. If you vary the character, environment, camera, and lighting together, you will not know which decision improved the image.
Create a small style board containing the approved hero frame, palette, material samples, scale reference, and three negative examples. The negative examples clarify boundaries such as “not photorealistic,” “no glossy plastic skin,” or “avoid miniature tilt-shift.”
Step 4: Lock character and object identity
A production character needs more than a beautiful portrait. Prepare references for front, side, back, three-quarter, neutral pose, and key expressions. Show costume layers and important props separately. Keep proportions consistent.
For hard-surface objects, include orthographic views and dimensions when accuracy matters. AI-generated concept art can suggest design, but it should not be treated as a technical drawing. Resolve impossible intersections and ambiguous surfaces before modeling.
Create an identity sheet with:
- silhouette and height ratios;
- recurring colors and materials;
- face, ear, hair, or horn geometry;
- costume and prop placement;
- features that must never change;
- features allowed to vary.
This sheet becomes the visual source of truth for modeling, prompting, and review.
Step 5: Build a rough 3D blockout
If control matters, build the scene first with simple primitives. Boxes, spheres, capsules, and low-detail proxies are enough. Establish scale, staging, entrances, exits, camera position, and major lighting direction.
A blockout answers expensive questions cheaply:
- Does the action fit the location?
- Is the character readable against the background?
- Can the camera make the move without intersecting geometry?
- Are there enough cut points?
- Does the edit preserve screen direction?
Do not polish a model before the shot works. A perfect asset cannot rescue weak staging.
Step 6: Create a timed previs
Previsualization is a rough moving version of the sequence. Use the blockout, simple key poses, temporary sound, and basic cuts. The goal is timing, not beauty.
AI can help draft shot descriptions, suggest coverage, identify continuity gaps, and generate alternate storyboard frames. A generative motion test can also reveal whether a proposed action reads clearly. But keep shot numbers and durations in your own timeline so the plan stays editable.
Review the previs for:
- story clarity without explanation;
- visual hierarchy in every frame;
- sufficient hold time for key information;
- camera motivation;
- continuity of direction and scale;
- feasible animation workload.
Lock the sequence length before high-detail asset work whenever possible.
Step 7: Choose an asset strategy
You have four practical options.
Build manually: best for hero assets, precise topology, and long-term reuse.
Start from licensed assets: fastest for environments, props, and generic supporting elements. Verify the license for the intended distribution.
Use AI-assisted 3D generation: useful for early meshes, background objects, and prototypes, but inspect topology, UVs, scale, material assignments, and hidden geometry. Generated meshes may look correct from one angle and fail under deformation.
Fake depth in 2.5D: separate a still into layers, place them at different depths, and animate a camera through the scene. This works well for slow pushes, parallax reveals, and stylized illustrations without building a full environment.
Use the cheapest method that satisfies the revision requirement. Not every rock needs production topology, and not every hero face should be an uncontrolled approximation.
Step 8: Clean and prepare geometry
Before rigging, inspect the model:
- remove duplicate or internal faces;
- fix non-manifold geometry;
- establish consistent scale and orientation;
- simplify dense areas that do not affect silhouette;
- create deformation-friendly edge flow around joints;
- unwrap or project usable UVs;
- name meshes and materials consistently;
- set pivots where objects should rotate.
AI can propose cleanup steps or automate repetitive operations through scripts, but always inspect the result. A command that works on one mesh can damage another with different topology.
Step 9: Rig only what must move
Rig complexity should match the performance. A background creature crossing the frame may need a basic skeleton. A speaking hero needs facial controls, eye direction, hands, foot locking, and deformation tests.
Automated rigging can create a useful first pass, especially for humanoid proportions. It still requires checks for shoulder collapse, elbow direction, knee popping, wrist rotation, cloth intersections, and facial range.
Test extreme poses before animation begins. Fixing the rig after twenty shots are animated is far more expensive.
Step 10: Animate from blocking to polish
Work in passes:
- Key poses: establish readable silhouettes and emotional intent.
- Timing: set when actions begin, accelerate, settle, and overlap.
- Breakdowns: define arcs and transitions between major poses.
- Spline or interpolation pass: smooth motion while preserving intent.
- Secondary motion: add tail, fabric, accessories, breathing, and follow-through.
- Polish: fix contacts, eye lines, foot sliding, intersections, and unwanted noise.
Motion capture or video-driven animation can accelerate the base performance. Treat it as source material, not a final result. Clean the feet, correct the center of gravity, adapt timing to the character's proportions, and exaggerate poses when the style requires it.
For short, stylized shots that do not need a reusable rig, test the approved keyframe through an image-to-video workflow. Describe one primary action and one camera behavior. Too many simultaneous motions increase drift.
Step 11: Direct the camera deliberately
A camera move needs a reason. It can reveal information, increase scale, follow action, shift point of view, or create emotional pressure. “Make it cinematic” is not enough.
Record the start frame, end frame, subject distance, lens character, movement path, and focus target. For generative clips, the same structure improves prompts:
Slow low-angle dolly forward through the canyon, character walks toward the warm opening, stable costume and face, lantern hand remains visible, subtle cloth follow-through, no orbit, no sudden zoom.
Avoid stacking incompatible directions such as dolly forward, orbit, crane up, handheld shake, and rapid zoom in the same short shot.
Step 12: Light for continuity
Establish a simple lighting rule for the sequence: key direction, fill level, color temperature, and practical sources. Keep the hero readable and preserve the direction across cuts.
AI concept frames may contain beautiful but contradictory light. Translate the intent into controllable lights rather than copying every highlight. In a generative sequence, repeat the same lighting vocabulary and use consistent reference frames.
Render quick grayscale or clay previews to check silhouette and contrast before expensive final passes.
Step 13: Render, enhance, and composite
For true 3D, separate useful passes where the project justifies them: beauty, depth, masks, shadows, emission, and motion vectors. Passes let compositors adjust atmosphere, focus, color, and integration without rerendering everything.
Generative enhancement can add surface richness or stylization to a simple render, but it can also change identity, geometry, and frame-to-frame details. Test it on a short range. Keep the original render so you can mask the enhancement selectively.
If you transform existing footage with a video-to-video workflow, use the source motion as a structural anchor. Prefer short shots, clear silhouettes, controlled backgrounds, and stable reference imagery. Review hands, faces, contact points, and repeated textures frame by frame.
Step 14: Edit and add sound
Animation becomes a film in the edit. Trim slow entrances, hold important poses, and cut on motivated action. Add temporary sound early because rhythm changes how motion feels.
Build sound in layers:
- ambience establishing the space;
- footsteps and physical contact;
- prop and cloth details;
- designed accents for magical or technological events;
- dialogue or vocal effort;
- music supporting the emotional arc.
Sound can make a simple visual feel finished, but it cannot hide continuity errors. Complete a silent visual review before relying on the mix.
What AI is especially good at
AI performs best when the task tolerates interpretation and benefits from many options:
- generating ten visual directions before choosing one;
- converting a brief into a first shot list;
- visualizing locations that do not yet exist;
- suggesting camera coverage;
- creating background texture variations;
- producing rough motion studies;
- identifying missing assets or continuity risks;
- writing small automation scripts for repetitive scene tasks;
- organizing review notes into actionable changes.
These uses shorten discovery and preparation. They leave final judgment with the creator.
Where AI still struggles
AI is less dependable when correctness is geometric, mechanical, or temporal:
- a hand must grip the same object for 200 frames;
- gears must mesh at a defined ratio;
- a product must match engineering dimensions;
- fabric must collide correctly with a complex rig;
- a character must remain identical across many angles;
- a camera move must be reproduced after a revision;
- the scene must render consistently from arbitrary viewpoints.
In those cases, use AI as an assistant around the technical system, not as a substitute for it.
A beginner project that is likely to work
Start with a five-to-eight-second environment reveal featuring one stylized character.
Concept: a small courier enters a glowing canyon and raises a lantern.
Why it works: one character, one prop, one action, one camera move, and a strong lighting change. The shot can be produced as generative 3D-style video, a 2.5D parallax scene, or a full 3D blockout depending on your goal.
Build it in this order:
- Generate and approve a character sheet and environment frame.
- Write the start and end composition.
- Create a rough storyboard with three frames.
- Test timing with a basic animatic.
- Choose true 3D, 2.5D, or image-to-video.
- Produce a low-cost motion test.
- Fix identity and action before adding atmosphere.
- Add sound and color only after motion passes.
This teaches the central lesson: prove the shot before scaling the pipeline.
Common mistakes and fixes
Trying to generate the entire sequence at once
Fix: work shot by shot with stable start frames and a continuity sheet.
Confusing a pretty frame with a usable design
Fix: require multiple views, a neutral pose, material notes, and resolved geometry before modeling.
Adding detail before timing works
Fix: lock the blockout and previs first. Polish only approved shots.
Asking for too much motion
Fix: define one subject action and one camera action per short generative clip.
Ignoring asset rights
Fix: track the origin, license, model terms, references, and allowed commercial use for every asset.
Removing all human review
Fix: inspect anatomy, contacts, identity, physics, continuity, and brand requirements at every handoff.
Quality-control checklist
Before publishing, check:
- character proportions and costume stay consistent;
- hands, feet, and props maintain believable contact;
- motion has weight, anticipation, and follow-through;
- no object intersects unexpectedly;
- camera movement is smooth and motivated;
- lighting direction makes sense across cuts;
- generated textures do not crawl or change identity;
- captions have safe space and adequate contrast;
- sound aligns with visible impacts;
- all source assets and voices are authorized;
- final duration, resolution, frame rate, and color meet delivery requirements.
Watch the export once at normal speed, once without sound, and once frame by frame around difficult contacts.
Frequently asked questions
Can AI make complete 3D animation by itself?
It can produce short 3D-style clips and assist many stages of a true 3D pipeline. It does not reliably replace editable geometry, rigs, simulations, scene management, and precise revision for every production.
Do I need to learn 3D software?
Not for every stylized social clip. If you need reusable assets, exact cameras, controlled character performance, or client revisions, basic 3D skills provide significant leverage.
Is AI-generated video actually 3D?
Usually it is a sequence of flat frames that looks three-dimensional. Unless the tool provides an editable scene, mesh, camera, and rig, treat the result as video rather than a 3D asset.
Where does AI save the most time?
Concept exploration, storyboard creation, previs, reference generation, motion drafts, repetitive cleanup, and production documentation usually offer the best returns.
Can I use AI-generated meshes for characters?
Yes, as a starting point, but inspect topology, UVs, symmetry, scale, and deformation. Hero characters often need substantial cleanup before rigging.
How do I keep a character consistent?
Use a locked identity sheet, stable reference images, one approved model or rig, a continuity ledger, and short controlled shots. Do not rely on text description alone.
What is the easiest 3D animation style for a beginner?
Stylized scenes with simple materials, strong silhouettes, limited characters, and one motivated camera move are easier than photoreal human performance or complex mechanical simulation.
Should I use AI-only or a hybrid workflow?
Use AI-only when speed and visual impression matter more than editability. Use a hybrid pipeline when you need reliable revision, asset reuse, or exact motion. Most serious projects benefit from the hybrid approach.
Build for the revision you expect
AI changes how quickly you can explore a 3D idea, but it does not remove the tradeoff between speed and control. Generative video excels at rapid visual possibility. A structured 3D scene excels at repeatable decisions.
Choose the pipeline by asking what must remain editable. Use AI to multiply concepts, clarify shots, accelerate rough motion, and support finishing. Keep rigs, cameras, geometry, and review checkpoints wherever the project depends on precision.
The winning workflow is not the one with the most AI. It is the one that reaches the intended image while preserving exactly as much control as the next revision will require.