AI can help one person create a cartoon that once required a small studio, but it does not remove the need for direction. The hardest part is rarely generating one attractive frame. It is keeping the same character, visual language, setting, and story logic across a sequence of shots.
The most reliable method is to separate design from production. First define the story, character, and style. Then create stable reference images and a storyboard. Animate short beats one at a time, record or generate voices, and assemble everything in a normal editor. This staged workflow catches expensive continuity problems before they spread across an entire episode.
You do not need to begin with a ten-minute film. A 15- to 30-second scene with one character, one setting, and one simple problem will teach you nearly every part of the pipeline.
What You Need Before You Start
A basic AI cartoon workflow has six components:
- A short script or beat outline.
- A character model sheet.
- A style guide and color palette.
- A storyboard with one keyframe per shot.
- An image-to-video or text-to-video model.
- An editor for timing, dialogue, sound, and export.
Optional tools include voice generation, lip synchronization, background removal, upscaling, and music generation. Add those only when the story needs them. A complicated tool chain can create more handoff problems than it solves.
DeepFake’s AI model library is useful for comparing visual engines without designing your whole workflow around a single model name. The production principles in this guide remain the same even when the model changes.
Step 1: Choose a Cartoon Format
“Cartoon” can mean many different production styles. Choose one before writing prompts because it determines how much consistency and motion you need.
Illustrated story short
Mostly static compositions with camera moves, blinking, fabric motion, and a few animated details. This is the easiest format for beginners and works well for narrated social videos.
Limited 2D animation
Characters use simplified movement, held poses, repeated cycles, and strong expressions. It is efficient and can look intentional when the art direction is clear.
3D toy-like cartoon
Rounded characters, dimensional lighting, and cinematic camera movement. It can look polished quickly, but small changes to proportions and materials become visible across shots.
Comic-motion hybrid
Panels, speed lines, impact frames, and selective animation create energy without requiring continuous full-body motion. This is effective for action, comedy, and dramatic narration.
Dialogue scene
The emphasis is performance, mouth movement, eye direction, shot-reverse-shot structure, and clean audio. This looks simple but demands strong identity and voice consistency.
Select the format that communicates the idea with the least generation risk. A clear limited-animation short is better than a chaotic imitation of a feature film.
Step 2: Write a Tiny Story with a Visible Change
A useful cartoon scene has a character, goal, obstacle, action, and outcome. Keep the first project small enough to describe in one sentence.
For example:
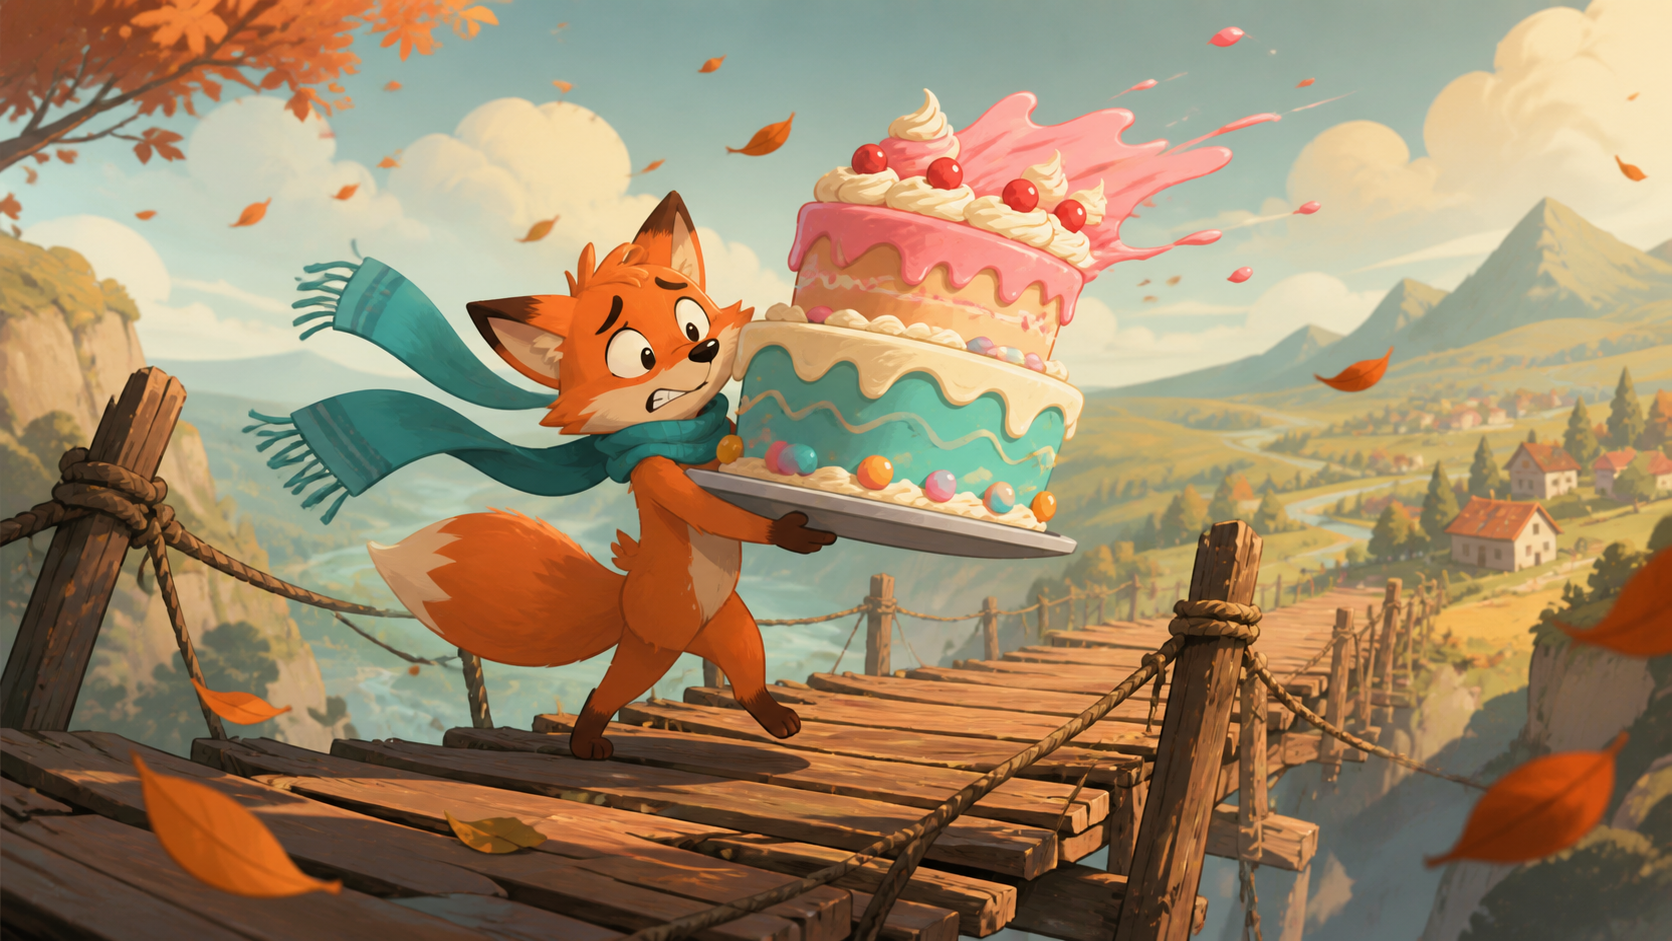
A nervous fox must carry a giant birthday cake across a windy bridge without losing the frosting.
This premise gives the model visual information and gives the audience a reason to watch. It naturally creates four beats:
- The fox sees the bridge and gathers courage.
- The fox steps onto the bridge with the cake.
- A gust bends the frosting and makes the cake wobble.
- The fox reaches the other side and celebrates.
Notice that every beat can be shown. Avoid starting with an abstract idea that depends on long exposition. Cartoons become easier to generate when emotion is visible through posture, expression, and action.
For a 30-second short, aim for 60 to 90 spoken words at most. Leave room for reactions, sound effects, and visual pauses.
Step 3: Design a Character That Can Be Repeated
Complex characters are not automatically memorable. A repeatable design uses a few strong signals:
- A silhouette recognizable at small size.
- Two or three dominant colors.
- One memorable accessory or prop.
- Simple shapes with stable proportions.
- An expression system that fits the tone.
- Clothing that does not contain tiny patterns or text.
Instead of “a cute fox,” write a production description:
A small orange fox with a large triangular head, cream muzzle and tail tip, dark brown paws, rounded black nose, and long teal scarf. Short legs, oversized expressive eyes, simple storybook proportions, no patterned clothing.
Separate permanent traits from scene-specific traits. The fox’s colors and proportions are permanent. “Worried, leaning into the wind, holding a cake” belongs only to one shot.
Do not imitate a living artist or reproduce a protected franchise character. Build an original combination of shapes, palette, costume, and personality that you can use consistently.
Step 4: Generate a Character Model Sheet
A model sheet is the visual source of truth for your character. Generate it before finished scenes. A useful sheet contains:
- Front, three-quarter, side, and back views.
- Neutral full-body pose.
- Close-up of the face.
- Four to six expressions.
- Color swatches.
- Important prop or accessory details.
Ask for a plain background, even lighting, and no dramatic perspective. Avoid labels or written annotations because image models often render text poorly. Store the design information in a separate written character card.
A sample prompt:
Original small orange fox cartoon character model sheet, front view, side view, three-quarter view, and back view; large triangular head, cream muzzle and tail tip, dark brown paws, long teal scarf, short legs, simple 2D storybook shapes, flat neutral lighting, clean pale background, consistent proportions in every view, no text, no labels, no logo.
Inspect the sheet closely. Check ear shape, tail markings, scarf length, eye color, paw count, and body proportions. Fix the sheet now rather than accepting “almost the same.” Every later image will inherit its ambiguity.
Step 5: Lock the Visual Style
A style guide translates taste into repeatable instructions. “Cute” or “cinematic” is too vague. Define the following:
- Rendering: flat vector, watercolor storybook, inked comic, clay-like 3D, or cel-shaded 2D.
- Line: none, thin brown, bold black, rough pencil, or clean tapered ink.
- Color: muted earth tones, bright primary colors, pastel palette, or high-contrast neon.
- Lighting: soft daylight, warm sunset, theatrical rim light, or flat graphic illumination.
- Texture: smooth, paper grain, painted brushwork, or simplified plastic material.
- Camera: eye level, graphic side view, wide cinematic lens, or stage-like composition.
- Background density: minimal shapes, detailed environment, or shallow depth.
Create two or three style test images using the same character and simple action. Choose one and save the exact prompt block. Reuse that block in every storyboard and scene prompt.
A limited palette improves consistency. Record the colors descriptively and, when the tool allows, with exact hex values. Color correction in the final edit can unify small differences, but it cannot rescue a character whose entire costume changes.
Step 6: Build a Storyboard Before Animation
The storyboard defines what each shot must accomplish. For every shot, record:
- Shot number and duration.
- Framing and camera position.
- Character action.
- Facial expression.
- Dialogue or sound cue.
- Start and end states.
- Required reference images.
The fox story might use:
| Shot | Duration | Image | Motion | Sound |
|---|---|---|---|---|
| 1 | 4 sec | Wide bridge and fox | Scarf flutters; slow push-in | Wind, wood creak |
| 2 | 5 sec | Medium fox with cake | Careful steps; cake wobbles | Footsteps, tray rattle |
| 3 | 4 sec | Close-up of frosting | Gust bends frosting sideways | Strong whoosh |
| 4 | 5 sec | Wide opposite side | Fox lands safely and smiles | Soft cheer, music resolve |
Generate still keyframes before video. A storyboard reveals composition, identity, and continuity problems at a fraction of video-generation cost.
If one image model struggles to keep four independent frames consistent, try generating the storyboard as a single grid or editing later panels from the first approved frame. The goal is not beautiful presentation; it is a dependable visual plan.
Step 7: Create Final Keyframes
Turn each approved storyboard panel into a clean, full-resolution keyframe. Use the character sheet as a reference in every shot. Attach environment and prop references when the model supports multiple images.
Keep prompts modular:
Character block: the permanent visual description.
Style block: rendering, line, palette, texture, and lighting.
Shot block: framing, pose, emotion, action, and environment.
Continuity block: what must remain unchanged.
Exclusions: text, logo, extra limbs, costume changes, unwanted objects, or altered proportions.
This separation makes troubleshooting easier. If the character drifts, revise the character or reference input. If the shot lacks drama, revise the shot block. Do not rewrite every part of the prompt at once.
Create both a start frame and end frame when the video model supports them. A start frame controls initial composition; an end frame gives the motion a destination. This is particularly useful for a head turn, object handoff, door opening, or camera move.
Step 8: Animate One Clear Beat per Clip
Use DeepFake’s image-to-video workflow when the approved still must remain the visual anchor. Describe movement, not the entire appearance already visible in the image.
Good first motions include:
- Blink and glance.
- Small head turn.
- Scarf or hair movement.
- Object wobble.
- Gentle camera push.
- Background parallax.
- One step or simple gesture.
Avoid combining running, spinning, speaking, camera orbit, weather changes, and scene transitions in a five-second prompt. Every extra action competes for temporal coherence.
A motion prompt for the bridge shot could be:
Preserve the fox’s design, teal scarf, cake shape, and bridge. The fox takes two careful steps forward while the cake wobbles slightly. A steady gust pushes the scarf and nearby leaves to the right. Slow camera push-in, stable anatomy, no cut, no new objects.
For a scene without an approved reference frame, text to video can be useful for establishing shots, abstract transitions, clouds, landscapes, or crowds where exact character identity is less important.
Generate several short takes and select the cleanest. Extending one long generation often increases drift. Short clips also make timing easier in the edit.
Step 9: Add Dialogue, Voices, and Lip Sync
Record dialogue after the script is locked but before final timing. You can use a human actor, a licensed synthetic voice, or your own voice model with proper consent.
Create a voice bible for recurring characters:
- Apparent age and vocal range.
- Tempo and energy.
- Accent or language.
- Emotional baseline.
- Pronunciation of names and invented words.
- Pauses, breaths, and signature mannerisms.
Generate or record one line at a time. Short clips are easier to synchronize and replace. Do not clone a real person’s voice without permission or imply an endorsement that does not exist.
For lip sync, use a forward-facing or three-quarter face with a visible mouth. Avoid frantic camera movement during dialogue. Review consonants, jaw shape, blinking, and the transition into and out of speech. Sometimes a reaction shot or cutaway is more natural than forcing a difficult line into one continuous close-up.
Step 10: Edit Like a Traditional Cartoon
AI generation produces raw shots. Editing turns them into a story.
In your editor:
- Place dialogue and key sound effects first.
- Trim picture to the performance rhythm.
- Use reaction shots to hide imperfect transitions.
- Add ambience beneath cuts so the scene feels continuous.
- Match color, contrast, grain, and sharpness across clips.
- Reframe for the target aspect ratio.
- Add titles and captions in the editor, not inside generated images.
- Mix voices clearly above music and effects.
Do not use a transition merely to hide every generation seam. A clean cut motivated by action or sound often looks more professional. Hold a strong still frame for a few extra beats when the audience needs time to understand a joke or emotion.
Step 11: Review Continuity Frame by Frame
Watch the cartoon once for story and once for defects. On the second pass, pause at every cut and check:
- Character face, proportions, and colors.
- Clothing, scarf, jewelry, and props.
- Left-right screen direction.
- Object position and hand contact.
- Background layout and time of day.
- Lighting direction and shadow intensity.
- Unwanted text or symbols.
- Extra fingers, limbs, tails, or duplicate objects.
- Lip movement and audio timing.
- Flicker, warping, or sudden texture changes.
Decide whether each defect is noticeable at normal playback speed. Fix story-breaking and identity-breaking issues first. A tiny background wobble may not matter; a changing face does.
How to Keep Characters Consistent
Character consistency improves when you reduce opportunities for reinvention.
Reuse the same references
Attach the same approved model sheet or character image to every shot. Do not generate a new “better” reference halfway through production unless you intentionally update all later material.
Keep permanent prompt language unchanged
Store the character and style blocks in a template. Changing “large triangular head” to “small cute face” can shift proportions.
Change one variable at a time
When testing expressions, keep pose and camera stable. When testing camera angles, keep expression and wardrobe stable.
Create reference packs
For a longer series, save approved close-ups, full-body views, poses, expressions, props, and environments. A single portrait is not enough for a running side view.
Use edits instead of fresh generations
If a frame is 90% correct, edit the broken element. Starting from scratch may solve one detail and introduce three new differences.
Keep shots short
Identity drift increases as motion and duration grow. Build long scenes from controlled shots and reaction cuts.
Common Problems and Fixes
The character changes between scenes
Use a stronger model sheet, repeat the permanent prompt block exactly, and reduce changes in lighting or perspective. Create the next frame by editing an approved frame when possible.
The character changes during the clip
Reduce clip duration and motion complexity. Start from a closer reference angle and ask the camera to remain stable.
The animation feels lifeless
Add one secondary motion: scarf flutter, breathing, eye movement, background wind, or a gentle camera push. Do not respond by adding five actions.
The motion looks chaotic
Rewrite the prompt around one subject, one primary action, and one camera instruction. Remove conflicting adjectives such as “slow frantic movement.”
The style drifts
Use the same style block and palette in every image. Apply a final color grade and consistent texture overlay in editing.
The story is hard to follow
Check the storyboard. Each shot should answer: what changed, and why does the next shot exist? Add an establishing shot or reaction instead of more dialogue.
Rights, Safety, and Ethical Use
Create original characters or use material you have permission to adapt. Avoid prompts that imitate a protected character, logo, or living artist’s signature style. If you use a real person’s face or voice, get explicit consent and disclose synthetic media where the context requires it.
Review the generation service’s commercial terms, retention policy, and model restrictions. Keep records of source assets, licenses, voice consent, music rights, and the models used. For children’s content, review age-appropriateness, advertising rules, and platform-specific requirements before publishing.
AI output still needs human editorial responsibility. Check the final cartoon for stereotypes, unintended symbols, unsafe actions, and misleading representations.
A One-Day Beginner Production Plan
You can complete a small test without building an entire studio:
Hour 1: Write a one-sentence premise and four-beat outline.
Hour 2: Generate and approve one character model sheet.
Hour 3: Choose a style and make a four-panel storyboard.
Hours 4–5: Create final keyframes and animate four short clips.
Hour 6: Record dialogue and collect sound effects.
Hours 7–8: Edit, review continuity, add captions, and export.
The purpose is not perfection. It is to discover where your workflow loses time or consistency before committing to a series.
Final Takeaway
The best way to create a cartoon with AI is to think like an animation director, not a slot-machine operator. Define a small story, design a repeatable character, lock the style, plan the shots, and animate one clear beat at a time. Use references to preserve identity and an editor to control rhythm, sound, captions, and continuity.
Start with one character, one setting, and one short scene. Once that scene survives the full pipeline—from model sheet to final export—you have a production system you can expand into episodes, campaigns, educational shorts, or an original animated world.