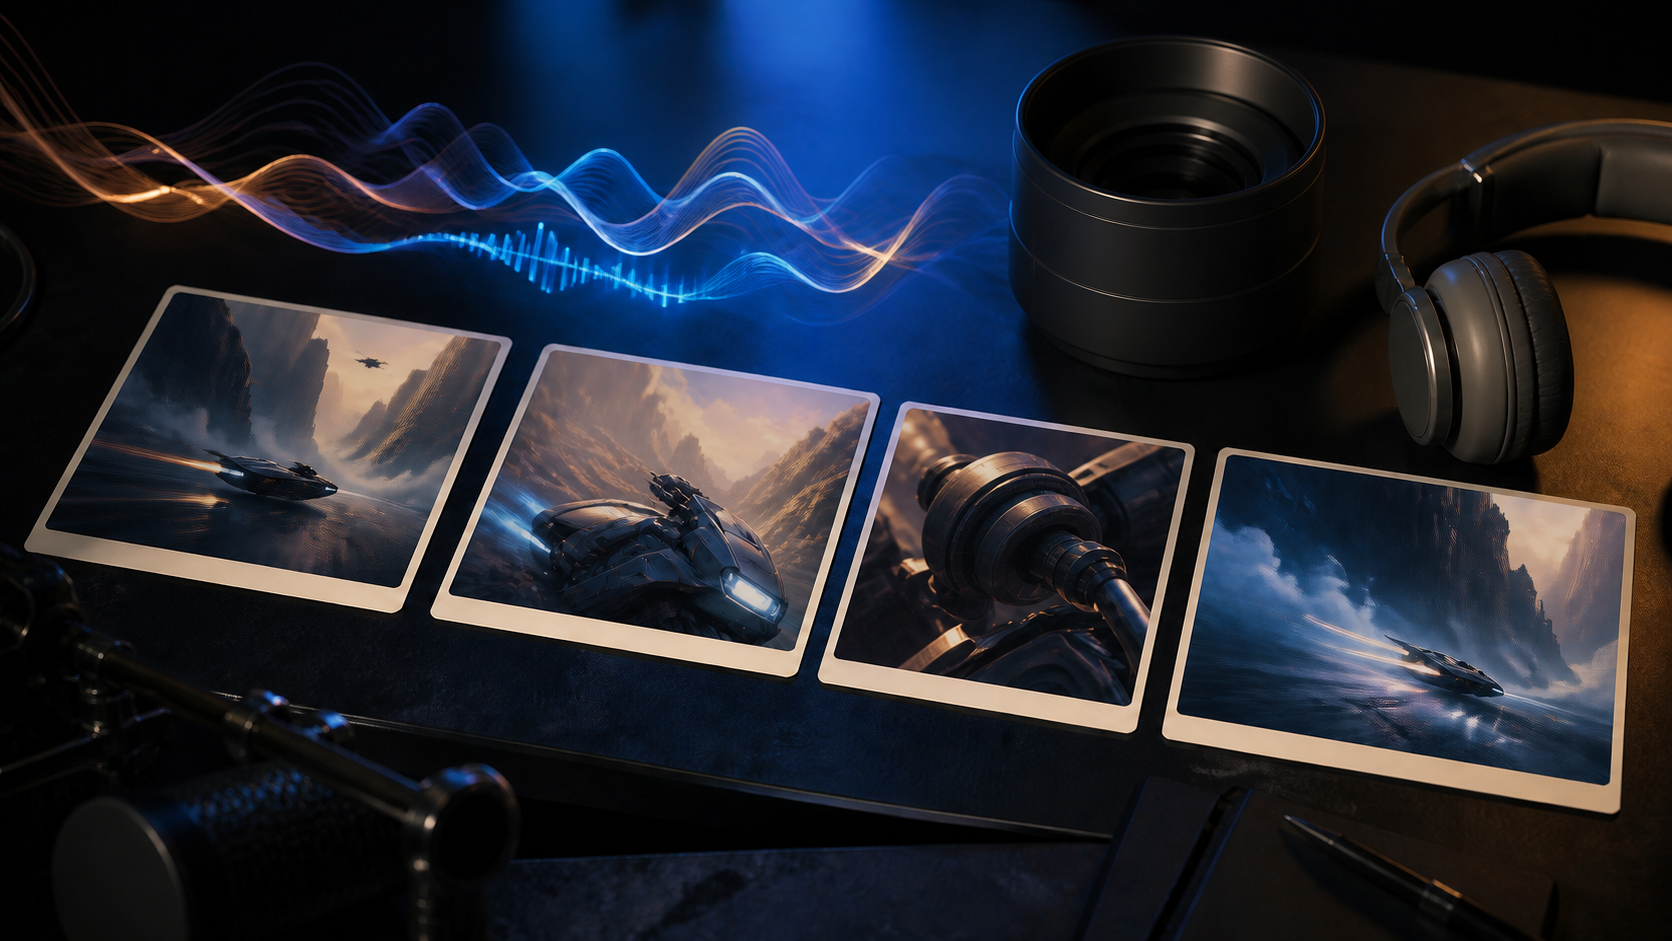
Kling Video 3.0 is built for more than a single silent visual. Its toolset combines text-to-video, image-to-video, start-and-end-frame control, multi-shot planning, element references, and optional native audio. That range makes it useful for advertisements, narrative scenes, music visuals, product concepts, social videos, and previsualization—but it also creates more decisions for the person directing the generation.
The key is to choose the smallest set of capabilities that serves the shot. A restrained image-to-video prompt may be better for a precise character portrait. A planned multi-shot generation can help when a dialogue or action needs coverage. Native audio may provide useful ambience, while a separately edited soundtrack may offer more control for a campaign.
This guide explains how to use Kling 3 through DeepFake as a production workflow. It covers mode selection, prompt structure, references, multi-shot design, sound direction, settings, quality control, troubleshooting, and final delivery. Interface options, model availability, and credit costs can change, so confirm current details in the workspace before generating.
What Kling Video 3.0 Adds
The Kling 3.0 family includes a standard Video 3.0 path and an Omni path designed for broader multimodal control. Exact availability depends on the platform and account, but the official model guide describes several defining capabilities.
Multi-Shot Narratives
A multi-shot mode can plan camera-angle changes and scene coverage from a prompt. A custom multi-shot mode gives the creator more explicit control over individual shots and their durations. This is different from asking a single camera take to perform several movements; the model is being directed to create cuts between distinct views.
Element and Subject References
Reference elements can help anchor characters, objects, and environments. This matters when the camera moves or the sequence cuts to another angle. References improve the model's evidence, but they do not remove the need for review. Clothing details, hand-held props, facial features, and scale can still drift.
Native Audio
Kling 3 can generate synchronized environmental sound, dialogue, and vocal performance with supported configurations. Its official guide describes Chinese, English, Japanese, Korean, and Spanish dialogue, along with selected accents and dialects. Native audio is optional in some modes, so decide early whether sound generation is part of the shot or will be handled in post-production.
Flexible Duration
The official Video 3.0 guide documents flexible output from 3 to 15 seconds. A longer generation can support a developed action or several shots, but length should follow the story rather than become a target by itself. Five coherent seconds are more useful than fifteen seconds that lose identity or pacing.
Text, Image, and Frame-Based Inputs
Creators can begin from a written scene, a starting image, or start and end frames, depending on the selected model and interface. Each input mode solves a different problem. Text provides freedom, an image anchors visual identity, and two endpoint frames define a transformation or transition.
Official documentation for the release describes 720p and 1080p configurations rather than native 4K generation. If a workflow needs 4K delivery, check whether the current product offers a separate upscale or export step; do not assume that output resolution and final delivery resolution are the same thing.
Step 1: Define the Deliverable Before the Prompt
Start with the final use, not the model. A social hook, product shot, dialogue scene, establishing view, music visual, and cinematic short all need different coverage.
Write a compact production brief:
- Goal: What should the viewer understand or feel?
- Format: Horizontal, vertical, or square?
- Length: How many usable seconds are actually needed?
- Subject: Which character, product, or environment must remain consistent?
- Action: What visible change happens during the clip?
- Coverage: One continuous shot or several edited angles?
- Sound: Native dialogue, ambience only, or audio added later?
- Acceptance test: What must be correct for the clip to be usable?
For example, “Create a vertical product reveal” is too broad. A stronger brief is: “Create an eight-second vertical reveal of a matte-black watch, beginning with a macro view of the crown, cutting to a slow three-quarter orbit, and ending on a stable front view with room above for a title. No dialogue; subtle mechanical ambience.”
That brief already determines most of the model choices.
Step 2: Choose the Right Input Mode
Open the DeepFake model catalog and confirm which Kling 3 variant and controls are currently available. Then select an input mode based on the type of control you need.
Text-to-Video
Use text-to-video when visual invention is welcome and there is no fixed character or product to preserve. It is well suited to concept footage, environments, mood shots, abstract transitions, and early creative exploration.
Text-to-video prompts must carry both the stable scene description and the motion direction. That makes prompt hierarchy especially important: subject and setting first, then action, camera, light, sound, and constraints.
Image-to-Video
Use image-to-video when the opening composition, character design, product, or art style already exists. The image does most of the visual anchoring, so the prompt can focus on movement, camera behavior, and sound.
Choose a clean, high-quality source. Fix malformed hands, unreadable labels, unwanted text, or background artifacts before uploading. Leave space for the requested motion, and begin close to the final aspect ratio.
Start and End Frames
Use endpoint frames when the transition itself matters: a camera moving from a wide view to a close view, an object changing state, a character completing a gesture, or a scene shifting from one composition to another. The two images should share enough visual logic that the model can infer a plausible path.
If the endpoints differ in every dimension—subject, location, camera angle, lighting, and style—the model may produce an unstable morph rather than a readable transition.
Element References
Use references when a named character, object, or location needs to appear across movement or shot changes. Select clear images from complementary angles. Keep the subject unobstructed, avoid contradictory clothing or lighting, and use consistent naming in the prompt.
More references are not automatically better. Each should provide useful evidence. Near-duplicate or inconsistent images can make the target less clear.
Step 3: Decide Between a Single Shot and Multi-Shot
A single shot preserves temporal continuity. It works well for a product orbit, a character gesture, a vehicle tracking move, a landscape reveal, or a compact emotional performance. It is also easier to diagnose because there is no cut where identity can change.
Multi-shot generation is useful when the scene needs coverage: an establishing view followed by a close detail, a conversation with shot-reverse-shot grammar, or a short action with setup, impact, and reaction. Use it because the story benefits from cuts, not merely because the option exists.
Before using multi-shot mode, make a shot list. A simple three-shot structure is often enough:
- Establish: Show where the event happens and establish screen direction.
- Develop: Show the principal action or interaction at a readable distance.
- Resolve: Land on the reaction, product, reveal, or final composition.
For a custom multi-shot prompt, label each shot and give it one camera setup, one action, and an approximate duration. Keep the total within the selected model's current limits.
Shot 1, wide low-angle view: a courier vehicle races through a misty canyon, moving left to right; the camera tracks alongside. Shot 2, medium front three-quarter view: the helmeted courier leans into a turn as orange light flashes across the visor. Shot 3, macro insert: a gloved hand engages a control and the vehicle accelerates. Shot 4, wide rear view: the courier escapes into luminous fog and holds as the engine fades.
This prompt gives every shot a purpose and maintains one direction of travel. Screen direction matters: reversing it accidentally can make the edit feel as though the subject turned around.
Step 4: Build a Prompt the Model Can Direct
A practical Kling 3 prompt uses layers:
- Scene anchor: subject, environment, time, and important visual facts
- Primary action: the main change the viewer must see
- Camera instruction: framing, angle, lens feel, and movement
- Timing: pace, sequence, or per-shot duration
- Audio: ambience, effects, speaker, dialogue, tone, and language
- Continuity constraints: elements that must remain stable
Text-to-Video Prompt Example
At blue hour, a solitary weather station stands on a windswept arctic ridge. A technician in an orange insulated coat secures a loose antenna as snow crosses the frame. Begin with a wide locked view, then make a slow push toward a medium shot. Cold natural light, realistic restrained movement, stable building geometry. Wind buffets the microphone; a metal cable taps softly against the mast. No dialogue.
The scene is specific, but the model still has room to create. The action is limited, the camera direction is clear, and sound belongs to visible events.
Image-to-Video Prompt Example
The subject takes one slow breath and turns their gaze toward the distant light. The camera makes a gentle arc from left to right while remaining at eye level. Hair and loose fabric respond subtly to the wind. Preserve facial identity, clothing details, original color palette, and background structure. Quiet city ambience; no speech.
Because the image already defines appearance and composition, the prompt mostly describes change and preservation.
Product Prompt Example
A narrow highlight travels across the bottle from left to right as it rotates one quarter turn on the pedestal. Macro three-quarter camera, very slow forward dolly, rigid label placement, unchanged bottle proportions, clean studio background. Soft glass contact tone and low room ambience. End on a stable front-facing product frame.
Keep essential typography out of generation when exact legal or packaging text must be preserved. It is often safer to composite the final label or title in an editor.
Step 5: Direct Native Audio Deliberately
Native audio can make a generation feel complete, but vague sound requests invite clutter. Write audio cues in the same order the viewer hears them and connect effects to visible events.
For ambience, describe the space: distant traffic under light rain, a quiet room with ventilation hum, insects and leaves at dusk, or a reverberant industrial hall. For effects, identify the source and timing: a latch clicks as the door closes, gravel crunches under the second step, or the engine rises during acceleration.
For dialogue, assign every line to a named character and specify language and performance only when needed:
Mara, speaking quietly in English with a tired but steady tone: “We have one chance.” Ivo looks toward the doorway, pauses, then replies in English with a restrained whisper: “Then we wait for the lights.” Low electrical hum continues beneath the exchange.
Avoid putting dialogue, camera direction, and physical action into one unbroken paragraph when several characters are present. Separate speakers and preserve consistent names. Review lip synchronization, voice assignment, pronunciation, emotional tone, ambience, and clipping independently.
If a campaign requires exact wording, a specific actor, multilingual localization, or later script revisions, separately recorded voiceover may be the more controllable choice. Native audio is an option, not an obligation.
Step 6: Choose Duration, Resolution, Aspect Ratio, and Audio Mode
Set duration according to the action. Three to five seconds can be enough for an insert or product move. Eight to twelve seconds may support a setup and reaction. A fifteen-second generation can carry a longer take or multiple shots, but every additional second creates more opportunity for drift.
Choose 720p for faster or more economical exploration when the interface offers it, and 1080p for candidates that justify final-quality generation. Current availability, processing time, and credit rates should be read directly from DeepFake before submission. Platform pricing may differ from the model maker's first-party pricing.
Match the aspect ratio to the destination. Use vertical framing when the subject and action fit a narrow stage; do not crop a wide two-character conversation into a format that removes one speaker. Leave negative space where titles or captions will be added later.
When choosing native audio or silent generation, ask which path reduces rework. A sound-dependent comedic beat may benefit from audio in generation. A product campaign with an approved soundtrack may be better generated silently.
Step 7: Generate a Test Before the Hero Render
The first generation should test the creative premise at reasonable cost. Use the same source, prompt, and core settings you intend to evaluate, but choose a practical preview configuration when available.
Watch the result once for the overall impression, then inspect it systematically:
- Does the opening frame establish the scene quickly?
- Is the intended action readable?
- Does the camera perform one coherent movement per shot?
- Are cuts motivated and well timed?
- Does the subject keep the same face, clothing, scale, and props?
- Do rigid objects retain their geometry?
- Does the final frame provide a usable endpoint?
- Does each sound correspond to the correct event?
- Is dialogue assigned to the correct speaker?
Save promising outputs even if they are not final. A clip with a strong first half may become useful after trimming, while a clean alternate can replace a weak shot in the edit.
Step 8: Iterate with Controlled Changes
Do not change the model, references, prompt, duration, and aspect ratio all at once. Adjust one variable so you can identify what improved the result.
If the subject drifts, simplify action and camera travel, strengthen the element reference, and shorten the shot. If a multi-shot sequence loses continuity at a cut, reduce the number of shots or assign fewer actions to each one. If motion feels weak, increase one visible action rather than adding several unrelated events.
For audio problems, shorten dialogue, separate speakers, simplify background sound, and use plain punctuation. If ambience overwhelms speech, request a quieter bed or generate silent footage and complete the mix later.
Maintain a generation log containing:
- Model and mode
- Source and reference asset versions
- Full prompt
- Duration, resolution, aspect ratio, and audio choice
- Cost shown at generation time
- Output identifier
- Review notes and the reason for the next change
This turns iteration into evidence instead of guesswork.
Advanced Multi-Shot Techniques
Establish Screen Direction
When a subject travels from left to right in the first shot, preserve that direction unless the story deliberately shows a reversal. State direction in each relevant shot. Consistent eyelines also help dialogue coverage feel connected.
Use a Visual Anchor Across Cuts
Repeat one distinctive but manageable element: an orange coat, a silver case, a circular doorway, or a warm rim light. The anchor helps the audience connect angles and gives the model a continuity target.
Vary Shot Size, Not Everything Else
A useful sequence might progress from wide to medium to close-up while keeping location, time, light, and action continuous. Changing location, wardrobe, palette, and lens language at every cut can turn a scene into unrelated images.
Plan an Edit Point
Use an action that can bridge shots: a character begins turning in the wide shot and completes the turn in the medium shot, or a hand reaches toward an object before the cut to its close-up. Motion across the cut creates continuity even when details vary slightly.
Know When to Generate Shots Separately
Custom multi-shot mode is convenient, but separate generations give more control over the best take for each angle. For an important commercial or narrative scene, consider generating coverage independently and assembling it in an editor. Use the integrated mode for ideation or when cross-shot coherence is more valuable than precise take selection.
Common Problems and Fixes
Character Identity Changes Between Shots
Use clearer references, reduce extreme changes in angle, keep naming consistent, and avoid simultaneous wardrobe or lighting transformations. Shorten the sequence or generate each angle from prepared reference frames.
The Model Ignores the Shot List
Make each shot concise and label it in order. Remove prose that could be mistaken for another event. Ensure the requested number and combined duration are reasonable for the selected settings.
Motion Looks Rubbery or Too Fast
Reduce action complexity, use explicit pacing such as “slow,” “controlled,” or “constant speed,” and avoid combining a fast orbit with intricate body movement. Start from a pose that naturally leads into the requested action.
Backgrounds Melt During Camera Moves
Use a slower camera, simplify patterned architecture, reduce travel distance, or choose a locked shot. Image references can anchor the starting composition, but the model still has to invent newly revealed space.
Dialogue Goes to the Wrong Character
Give every character a unique name and assign each line directly. Keep the cast small during testing. Separate dialogue turns clearly and avoid pronouns when they could be ambiguous.
Native Audio Feels Busy
Limit the soundscape to one ambience layer and the few effects connected to visible actions. Remove music from the generation if it competes with dialogue; add a controlled score in post-production.
On-Screen Text Is Unstable
Even with improved text handling, exact typography should be verified frame by frame. Add legal copy, prices, subtitles, product labels, and calls to action in post when correctness is critical.
Editing and Delivery Workflow
Treat Kling output as source footage. Trim unstable frames, select the strongest takes, and assemble the cut before adding final graphics. Match color and contrast across generations so that shots appear to share the same world. A subtle grade can unify footage, but it cannot repair broken identity or geometry.
Build sound in layers: dialogue, synchronized effects, ambience, then music. Check the mix on headphones and ordinary speakers. Use captions for spoken content, but keep them inside platform-safe areas and verify timing after every format conversion.
Export a high-quality master, then derive channel-specific versions. A vertical cut may need different shot choices rather than a simple center crop. Watch every final file from beginning to end with sound; encoding, caption position, and loudness can change after export.
Rights, Consent, and Disclosure
Use source images, videos, voices, music, and references that you created, licensed, or have permission to transform. Obtain informed consent before generating a recognizable real person's appearance or voice, especially in advertising, sensitive contexts, or realistic statements they did not make.
Do not present synthetic footage as documentary evidence. Label AI-generated or AI-assisted media when the context, platform, or audience calls for disclosure. Keep records of source rights, releases, prompt versions, and final approvals for professional work.
Review the result for unintended logos, private information, stereotypes, unsafe behavior, and misleading implications. Model capability does not transfer editorial responsibility away from the creator.
Final Checklist
Before publishing, confirm that:
- The mode matches the control needed for the scene.
- The prompt has a clear subject, action, camera plan, timing, and sound direction.
- Multi-shot sequences have motivated cuts and consistent screen direction.
- Character, object, wardrobe, and environment details remain stable.
- Native audio is synchronized, intelligible, and assigned correctly.
- Resolution, duration, aspect ratio, and credit cost were verified in the current interface.
- Text and brand elements are accurate or added in post-production.
- The edit has a clean opening, useful endpoint, and platform-safe framing.
- All source assets and depicted people are covered by the required rights and consent.
- The delivered file has been watched and heard in its final format.
Conclusion
Kling 3 is most effective when its advanced features serve a clear directing plan. Choose text, image, endpoints, or references for the kind of control the shot requires. Use multi-shot mode when cuts strengthen the story, and give native audio the same precise direction you give the camera.
Begin with a brief, generate a focused test, review every layer, and change one variable at a time. That discipline produces more than an impressive demo: it creates footage that can survive an edit, communicate an idea, and be repeated across a real production.