The best source photo for an AI face swap gives a clear view of the face from an angle that fits the target. Use a sharp portrait of one person, with both eyes readable, the chin inside the crop, and enough detail in the shadows to see the shape of the cheek. If you have several possible portraits, keep the target shot fixed while you compare them.
Source and target play different roles. The source photo is the identity reference. The target shot supplies the lighting, movement, and expression the edit needs to follow. A flattering portrait can still be a difficult reference if its eyes are hidden by reflections or its angle is very different from the target.
Check the face at its actual size
| Check | Prefer | Try another portrait when |
|---|---|---|
| Sharpness | Eyelids, lips, and the jaw are easy to see at normal size | Face detail comes mainly from artificial sharpening or heavy smoothing |
| Crop | One face with room around the forehead, temples, and chin | Hair, chin, or the far edge of the face has been cut out |
| Light | Visible detail on both sides of the face | One cheek disappears into shadow, or a bright highlight obscures an eye |
| Angle | A straight or gentle three-quarter view that fits the target | The only reference is a strong profile or an extreme upward angle |
| Obstructions | Eyes, nose, and mouth are visible | A hand, glasses glare, hair, or a prop hides several landmarks |
Start from the original camera image if you have it. A screenshot or a photo downloaded from a chat can look crisp on a phone while retaining very little detail around the eyes. Cropping away unrelated background can help clarify which face to use, but adding pixels to a soft image rarely restores the original detail. Keep a modest margin around the head.
Compare three portraits against one shot
Choose one target clip of a consenting adult performer or a fictional adult character. A fixed camera and a slight turn give you enough variation for a useful test. Prepare three references of the same replacement identity.
- Balanced light and sharp detail. Use this as the baseline. Note what happens to the far eye and the outline of the face as the target turns.
- Soft or blurred detail. Use the same framing where possible. Check whether a softer reference leads to less defined eyes or mouth, especially around the turn.
- Strong side shadow. Pick an otherwise sharp portrait. Compare the shadowed cheek and the blend with the target light while keeping the same target and face rank.
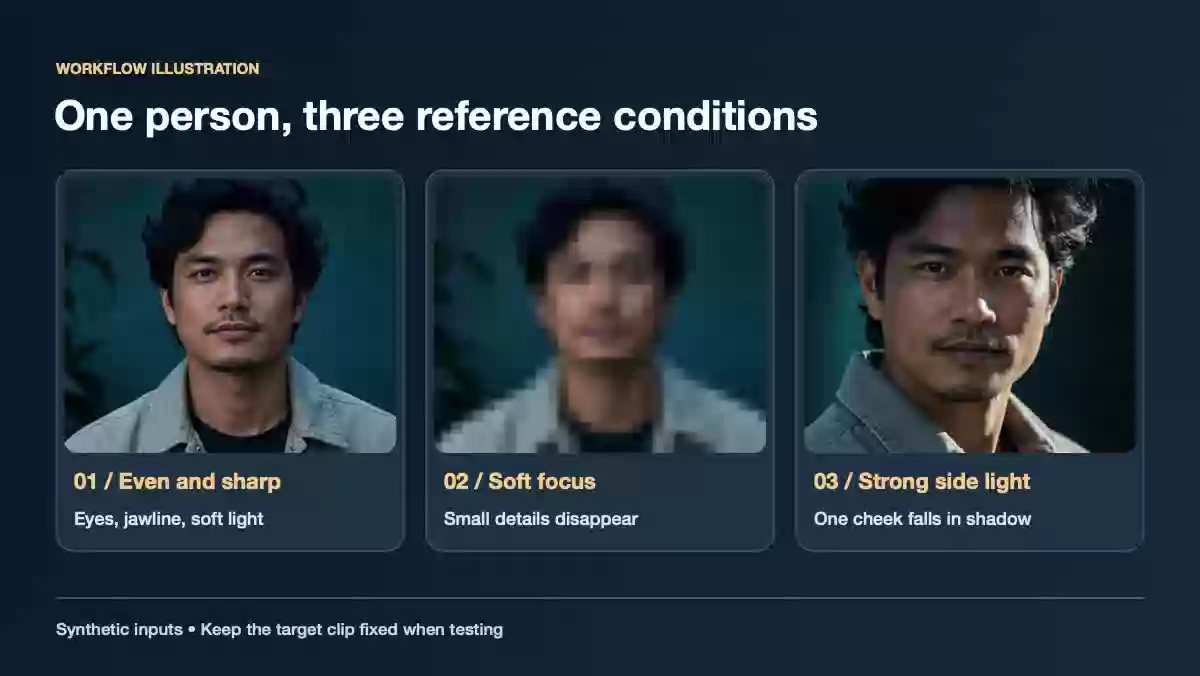
The portrait comparison shows the variables to isolate. Run each candidate against the same shot to see how they affect your result.
Keep notes at the same three moments, for example the first clear frame, the deepest turn, and the last visible expression. Use short comments such as “far eye loses definition during turn” or “jaw edge stays readable.” Those observations are easier to act on than a general quality score. Choose the portrait that holds up at the most demanding point in the actual clip.
Choose a format and make one change at a time
The source portrait picker in Photo Face Swap and Video Face Swap lists JPG, PNG, and WebP, with an image limit of 10 MB. Export an ordinary copy with the color and detail you see in the original, then inspect it at 100 percent. A heavier file is worth keeping only if it preserves useful facial detail.
If every portrait breaks at the same instant, return to the target clip. A hand passing in front of the face or a cut into a side profile may explain the pattern. Try a cleaner shot before retouching the reference further. Use the video face swap guide for the upload sequence and the troubleshooting guide if the problem persists across multiple source images.